In this easy step-by-step tutorial (with video!), I'll show you how to do string art, along with an easy trick to paint letters on wood if you don't exactly have a steady hand (I certainly don't).
Join 500+ cozy folks for weekly recipes, crafts & good vibes - from my home to yours.
When you sign up, I'll send you the Cozy Weekend Starter Pack-
a free PDF with 3 recipes, 3 crafts, & cozy weekend vibes.

If you've spent hours after hours, late into the night, browsing through Pinterest, then you've seen string art. It's a really cool and easy way to add some personality to any room in your home.
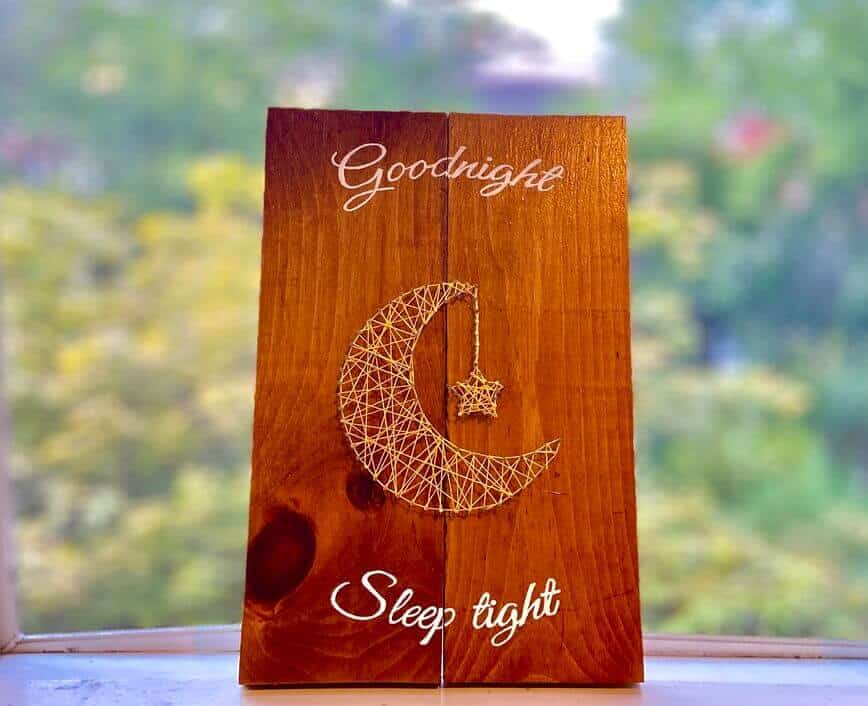
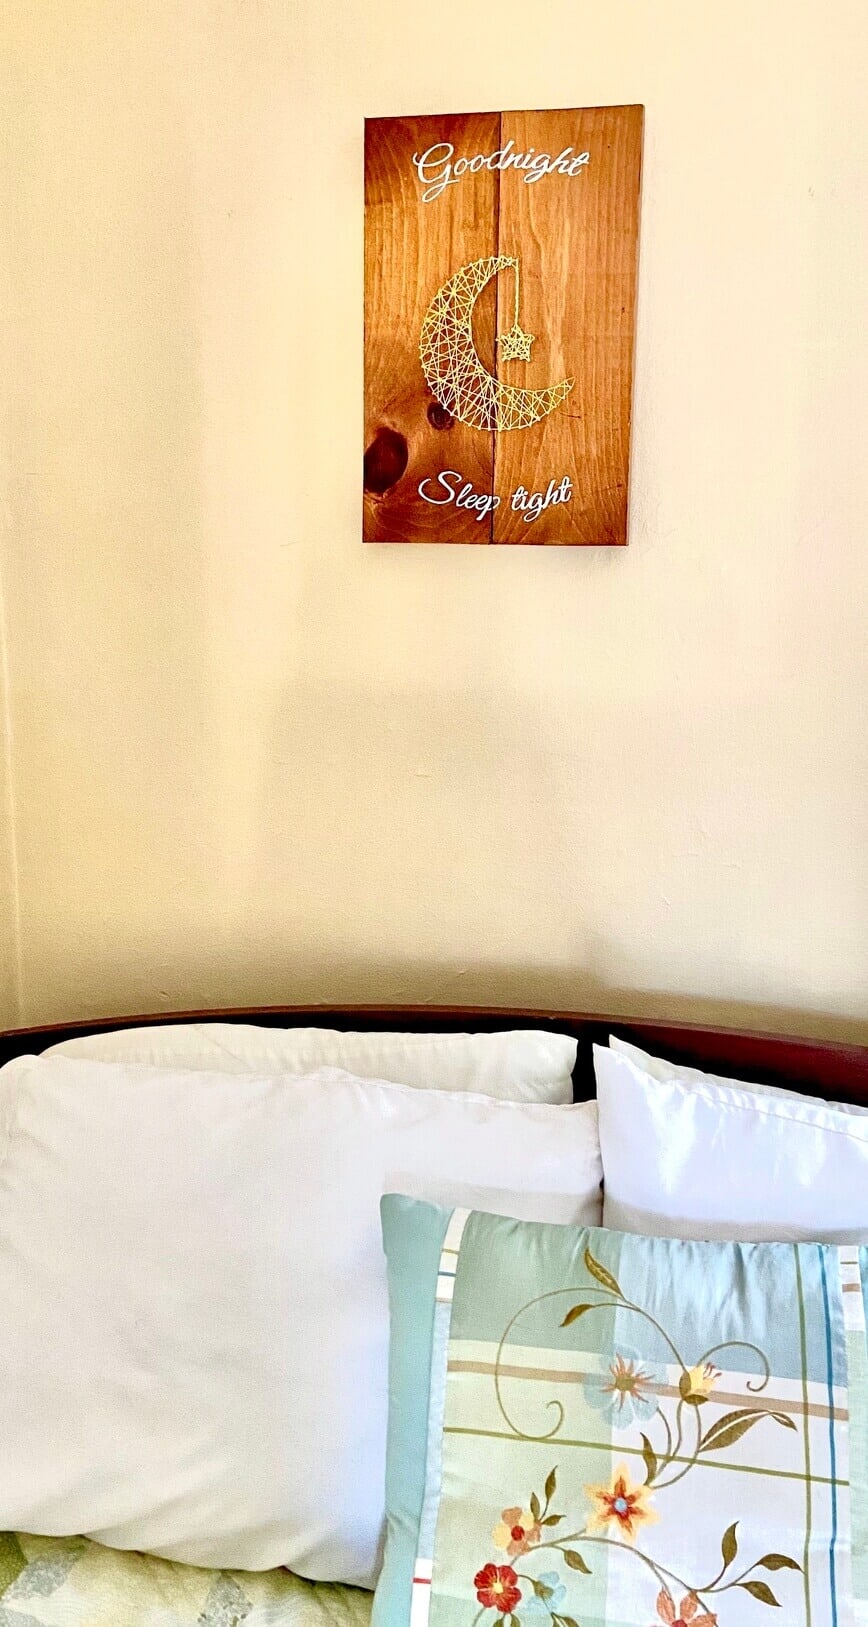
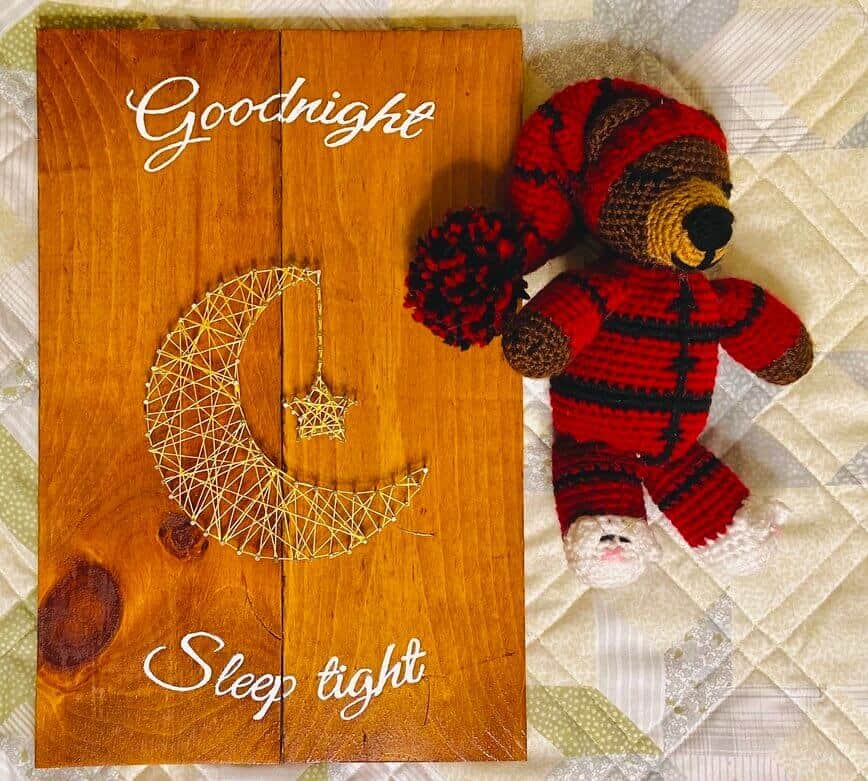
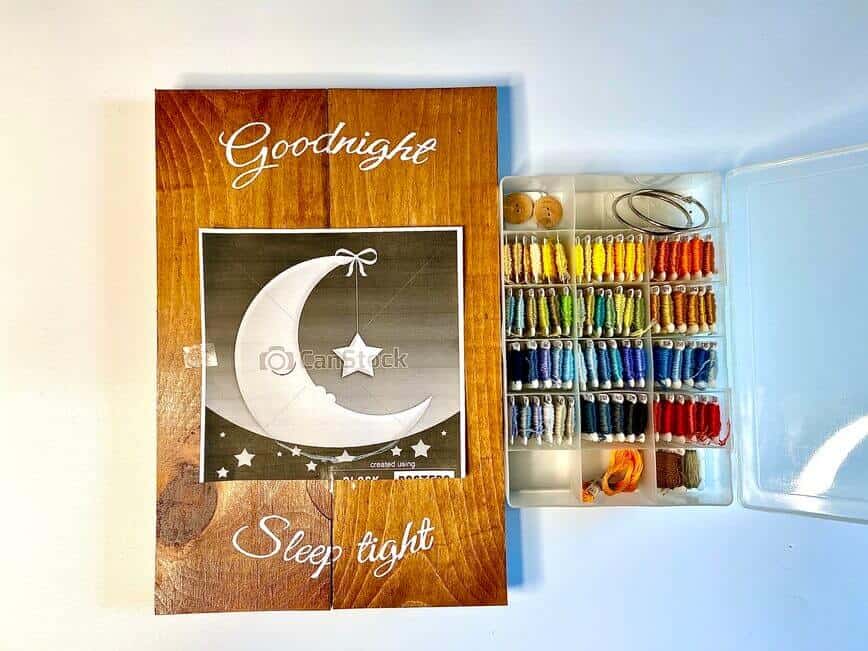
For my project, I had an idea for our guest room...Goodnight, Sleep tight, with a cute moon and star, hanging on the wall right over the bed, to add a bit of whimsy.
The steps for this project are so simple, you'll have your own string art ready to hang in your home by tonight!
All you'll need for this project are a few common household items and embroidery or cross-stitch floss.
🔨 Materials
- Wood (any size and type you like, as long as you can hammer a small nail into it)
- Printed template
- Lots of 1" nails with small head
- Hammer
- Cotton embroidery/cross-stitch floss
- Extras: For painting, you'll need a printed template, sewing needle, white pencil, paint, paintbrush, and clear lacquer spray paint
⭐ Note on nails: You'll want to use nails that are about 1" long and have a small head. I would not recommend finishing nails because there's virtually no head on them and the string may slip off the ends.
⭐ Note on string: I chose to use embroidery or cross-stitch floss for my project. If you also use this type of thread, make sure you use all six strands. Alternatively, you could also use a fine yarn or other similar string.
📹 Video tutorial
🖌️ How to paint text onto wood
The first thing you're going to need is a pretty piece of wood to act as the canvas for your string art project. I didn't have one single piece that was large enough for my project, so we attached two boards together and then I applied a coat of stain with polyurethane for a nice color and glossy finish.
Once you have your "canvas" ready, you can then add some words (if you're not adding any text, skip down to How to Make String Art, below).
If you have a steady hand, please, feel free to hand paint the letters. I, however, am not that person.
You can also use a Cricut machine to print words onto sticky paper that will adhere to the wood.
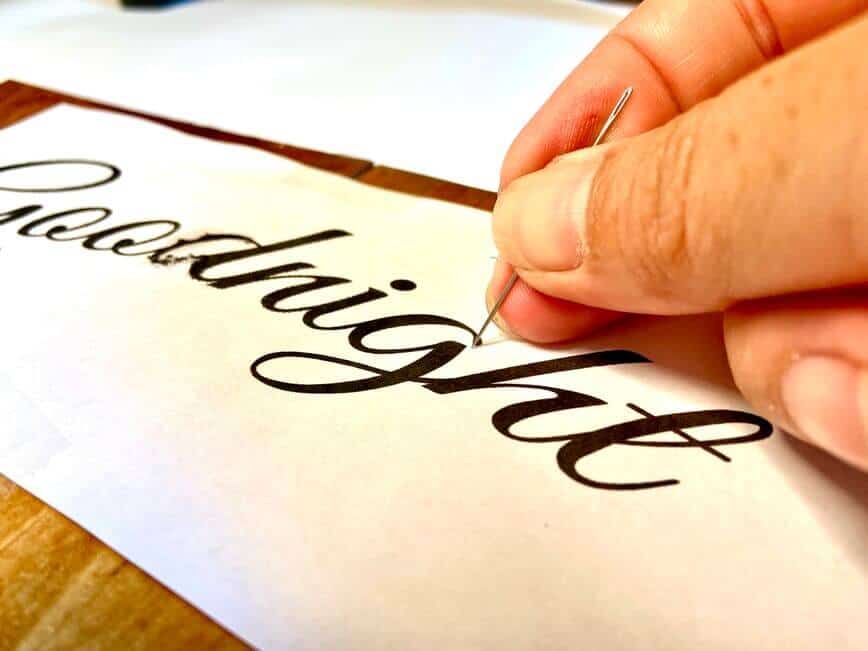
In my case, I prefer to customize my text at Picfont, then print them out over multiple sheets on paper on my home printer, using another free website, Block Posters. Once your text is printed out, place it on the wood where you want it and tape it to the surface using some Scotch tape.
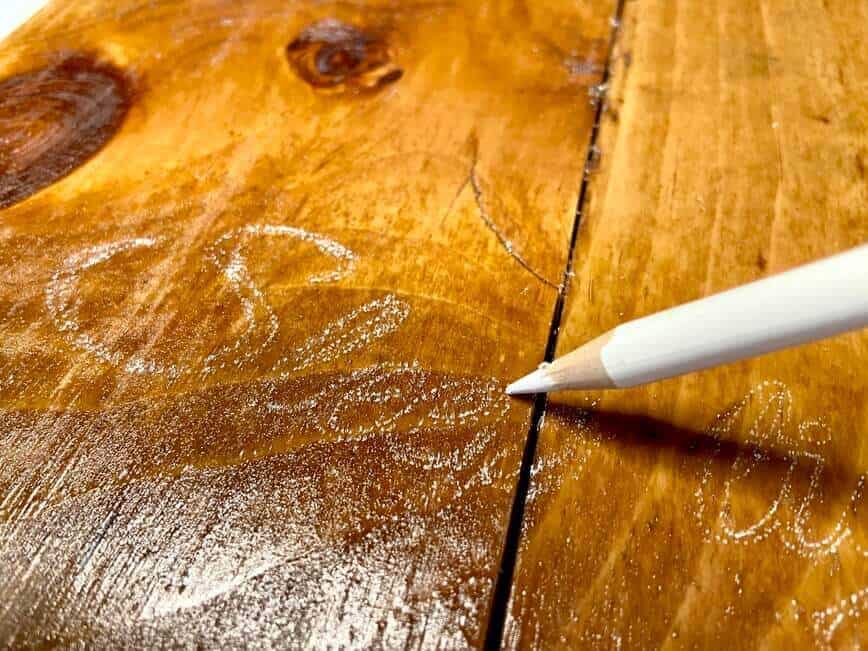
Using a sewing needle, trace out the letters with tiny holes, like you would do to make a jack-o-lantern on Halloween. Ok, admittedly, this was a little time consuming and my fingers were sore by the end...but it's totally worth it for neatness' sake.
Remove the paper and trace over your needle holes with a white pencil. In my case, the pencil didn't adhere very well to the polyurethane surface, but it still did fill in the tiny holes enough that I could see an outline of each letter.
Using the white pencil outline as a guide, paint your text onto the wood. In my experience, this often takes two coats.
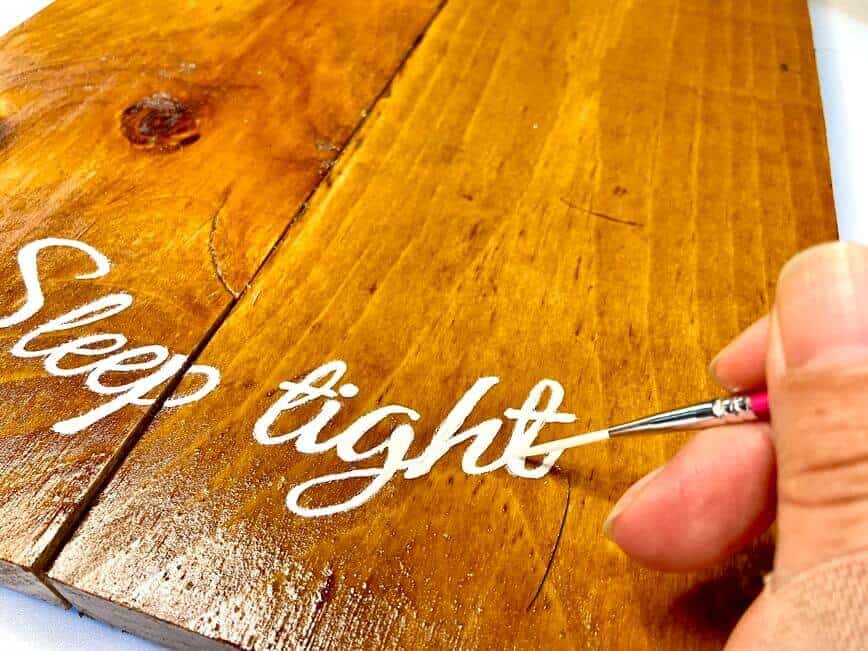
Once the painted letters were dry, I added a thin coat of clear lacquer to act as a layer of protection from chipping.
🪢 How to make string art
If you can freehand a design for your string art project, then absolutely do that! I, however, was not feeling the love from the freehand art gods that day, so I decided to find some clip art on good ol' Google.
If you decide to go the clip art route, like me, I'd recommend picking an image that has simple lines. In a few minutes, you're going to need to fit lots and lots of nails in a small space, and could run into problems if the design is too intricate.
After printing out the image to the correct size, tape it into place on the wood surface so it won't move while you're hammering in the nails. And choose which colors you'll use for this beautiful artwork. Ah, decisions, decisions. So many pretty colors to choose from...
Lightly hammer nails around the outline of your design, spacing them about ½" apart, then remove the paper template.
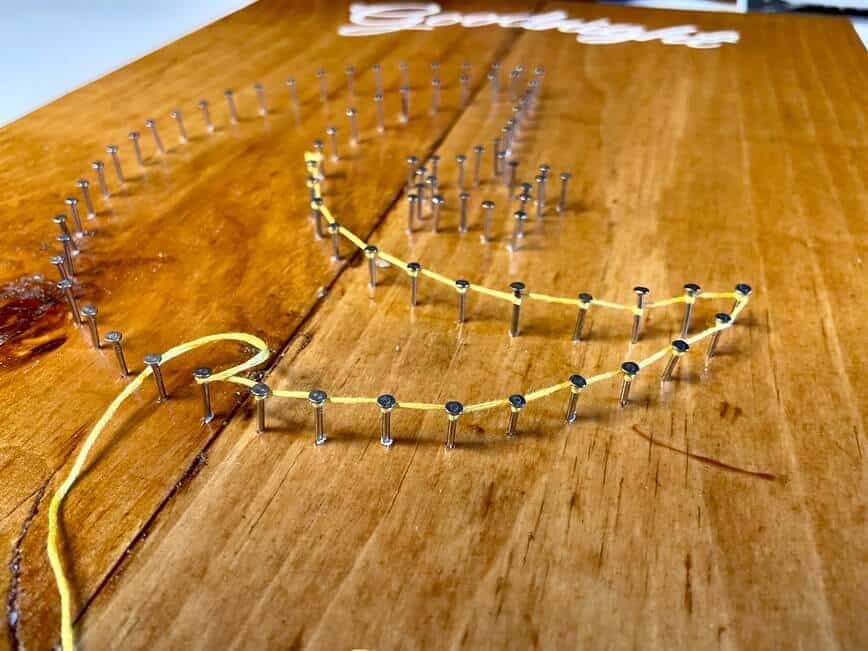
Tie a secure knot around one of the nails. Next, wrap the thread around the nails. You can outline the design first...or not. Just wrap in random directions, to keep the look interesting, always keeping the string tight.
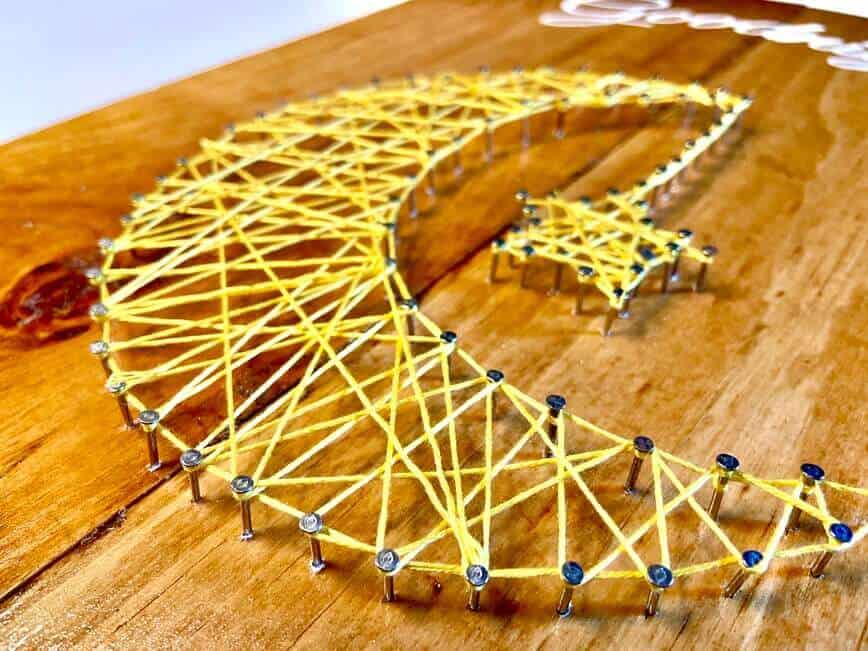
When your design is finished, make a tight knot around a nail, carefully cut off the end of the thread, and you're finished!
Do you love crafting as much as I do? Check out a few more fun projects now!
- DIY Custom Painted Doormat
- Tree Branch Art for Your Natural Home Decor
- 3 Creative and Useful Wine Cork Crafts
- Easy 2-Hour Slouch Hat Crochet Pattern
- How to Transfer Photos to Wood (the easy way!)
- DIY Etched Wine Glasses
- Shabby Chic Sign for the Holidays
- Luxury Body Sugar Scrub
- Elevated Cat Feeding Station
- How to C2C Crochet
Did you make this String Art? Let us know in the comments below!


Leave a Reply