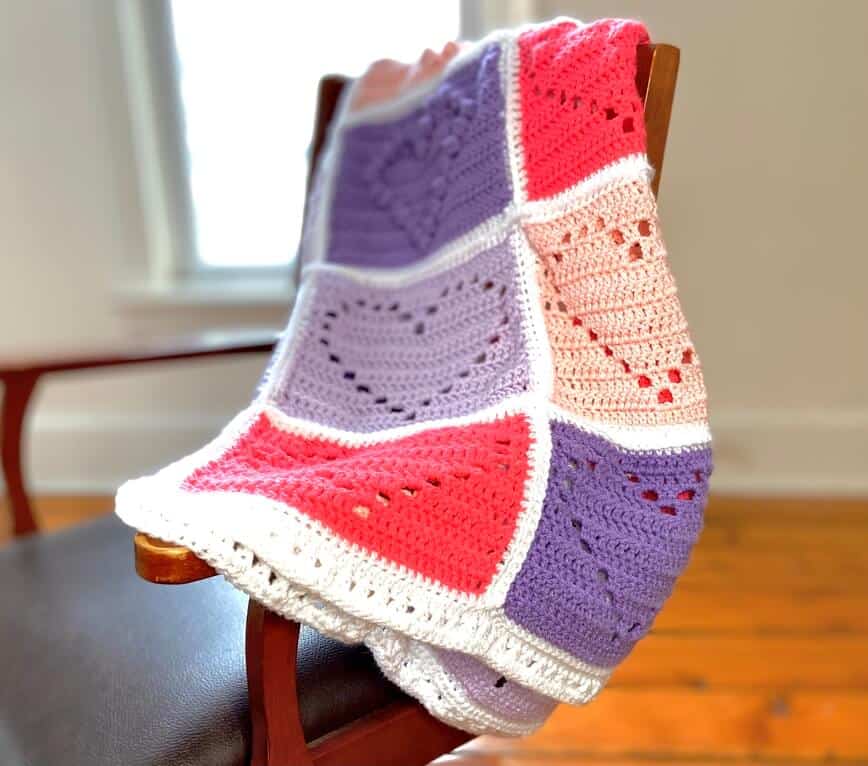
This Valentine's Day, tell that special someone "I love you with all my heart" with this beautiful crochet heart blanket. This handmade one-of-a-kind Valentine's gift will show just how much you care, with its cozy softness and lovely heart details.
Jump to:
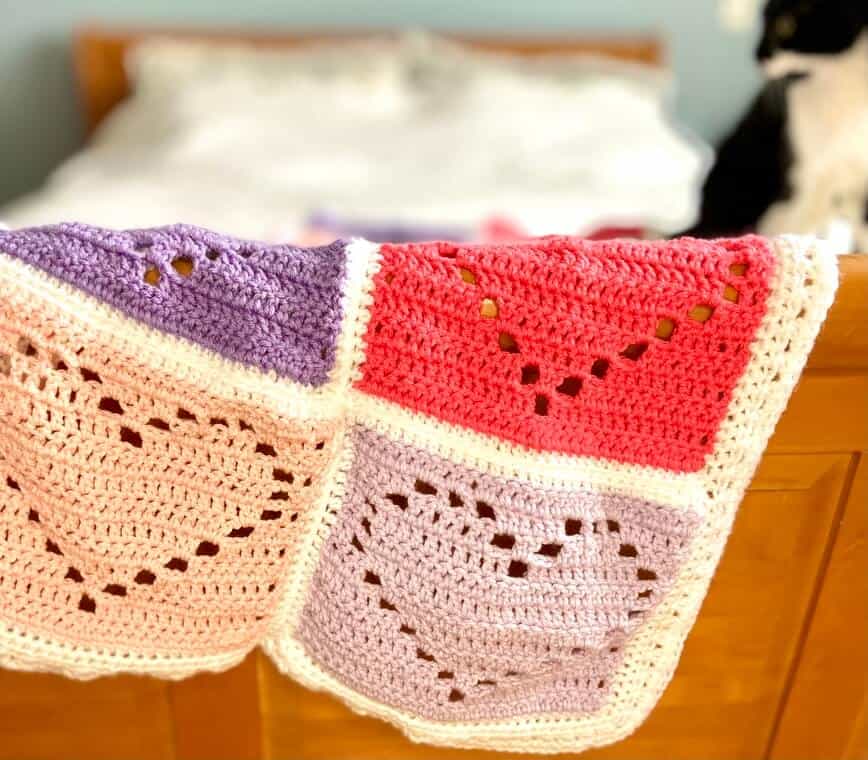
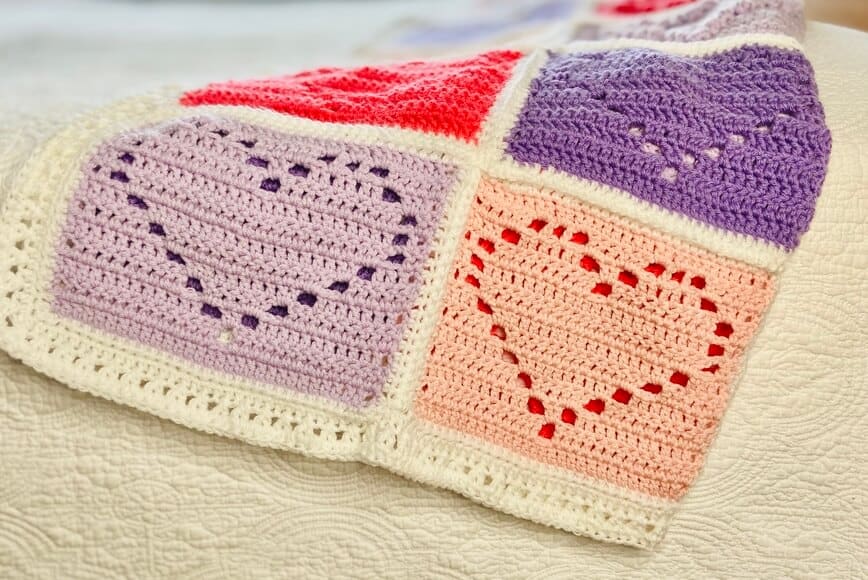
And best of all, this easy crochet blanket pattern is completely customizable. While I made a throw blanket size, you can easily make it larger...just add more hearts! And choose any colors you like, and vary the number of open hearts and bobble hearts, to make it your own. Essentially, you can personalize this blanket to your heart's content! ❤️
🪝 Crochet stitches
This crochet blanket pattern uses the half-double crochet, double crochet, bobble stitch, and X-stitch...but no worries, I've included a tutorial showing you all the stitches! In addition, there is a stitch in row 12 of the open heart where you may want to refer to the video at 10:55. It's easy, but a little confusing to explain here in print.
🧶 Materials
- Approx 1700 yards of #4/worsted weight yarn
- J-10 / 6-mm hook
- Scissors
- Yarn needle
*If you'd like to use the same yarns and colors as in my photos, I used:
- I Love This Yarn - amethyst, orchid, and tropical pink
- Yarn Bee Soft & Sleek - soft pink
- Red Heart - white
⭐ Notes
- All instructions, abbreviations, and materials in this pattern are given in US terminology.
- Please refer to the tutorial video for a more detailed description and review of the double crochet, open squares, bobble stitch, and X-stitch.
- This pattern will make a throw blanket size, measuring approximately 42" x 52".
- Due to the fact that this blanket is customizable to larger sizes, no total stitch numbers are given for the border.
✨ Crochet abbreviations for this pattern
- st – stitch
- sl st – slip stitch
- ch – chain
- ch st – chain stitch
- sp – space
- sk – skip
- sc – single crochet
- hdc – half-double crochet
- dc – double crochet
📹 Video tutorial
📝 Pattern
Open hearts
*Total stitch count for every row will equal 30.
Foundation Row: Ch 30.
Row 1: Ch 3 (turning chain), dc into fourth stitch from hook, then dc in each st across (30).
Row 2: Ch 3, dc in next 13 st, ch 2, sk next 2 st, dc in next 14 st.
Row 3: Ch 3, dc in next 11 st, ch 2, sk next 2 st, two dc in ch 2 sp, ch 2, sk next 2 st, dc in next 12 st.
Row 4: Ch 3, dc in next 9 st, ch 2, sk next 2 st, two dc in ch 2 sp, dc in next 2 st, two dc in ch 2 sp, ch 2, sk next 2 st, dc in next 10 st.
Row 5: Ch 3, dc in next 7 st, ch 2, sk next 2 st, two dc in ch 2 sp, dc in next 6 st, two dc in ch 2 sp, ch 2, sk next 2 st, dc in next 8 st.
Row 6: Ch 3, dc in next 5 st, ch 2, sk next 2 st, two dc in ch 2 sp, dc in next 10 st, two dc in ch 2 sp, ch 2, sk next 2 st, dc in next 6 st.
Row 7: Ch 3, dc in next 3 st, ch 2, sk next 2 st, two dc in ch 2 sp, dc in next 14 st, two dc in ch 2 sp, ch 2, sk next 2 st, dc in next 4 st.
Row 8: Ch 3, dc in next st, ch 2, sk next 2 st, two dc in ch 2 sp, dc in next 18 st, two dc in ch 2 sp, ch 2, sk next 2 st, dc in next 2 st.
Row 9: Ch 3, dc in next st, ch 2, sk next 2 st, dc in next 22 st, ch 2, sk next 2 st, dc in next 2 st.
Row 10: Ch 3, dc in next st, ch 2, sk next 2 st, dc in next 10 st, ch 2, sk next 2 st, dc in next 10 st, ch 2, sk next 2 st, dc in next 2 st.
Row 11: Ch 3, dc in next st, two dc in ch 2 sp, ch 2, sk next 2 st, dc in next 6 st, ch 2, sk next 2 st, two dc in ch 2 sp, ch 2, sk next 2 st, dc in next 6 st, ch 2, sk next 2 st, two dc in ch 2 sp, dc in next 2 st.
Row 12: Ch 3, dc in next 3 st, two dc in ch 2 sp, ch 2, dc in sp between posts (after next two posts; see video @ 10:55), ch 2, dc in sp between posts, ch 2, two dc in ch 2 sp, dc in next 2 st, two dc in ch 2 sp, ch 2, dc in sp between posts, ch 2, dc in sp between posts, ch 2, two dc in ch 2 sp, dc in next 4 st.
Row 13: Ch 3, dc in next 5 st, two dc in ch 2 sp, two dc in ch 2 sp, two dc in ch 2 sp, dc in next 6 st, two dc in ch 2 sp, two dc in ch 2 sp, two dc in ch 2 sp, dc in next 6 st.
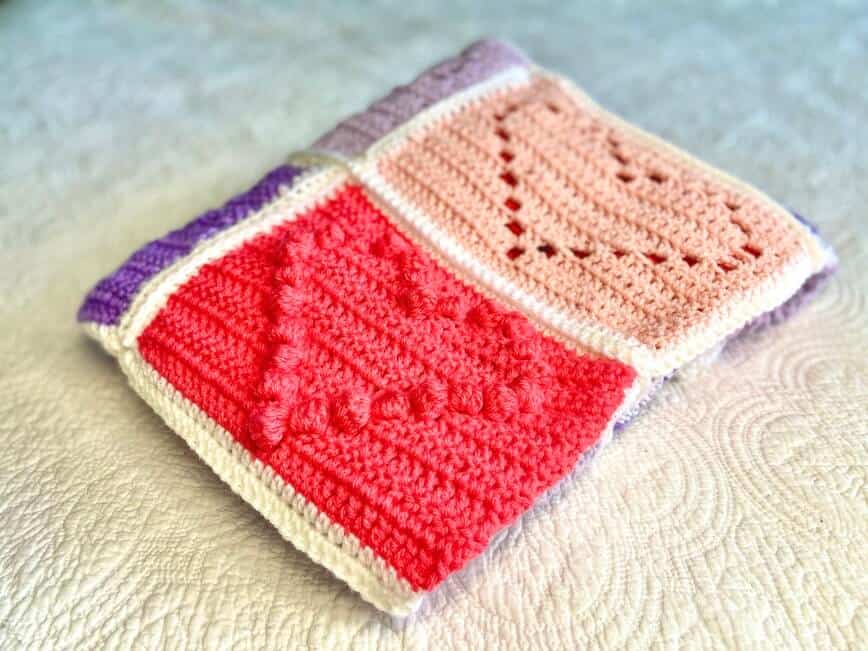
Bobble hearts
*Total stitch count for every row will equal 30.
**Each bobble will be formed with 8 loops on hook
Foundation Row: Ch 30.
Row 1: Ch 3 (turning chain), dc into fourth stitch from hook, then dc in each st across (30).
Row 2: Ch 3, dc in next 13 st, make a bobble stitch, sc, dc in next 14 st.
Row 3: Ch 3, dc in next 12 st, bobble, sc, dc, bobble, sc, dc in next 12 st.
Row 4: Ch 3, dc in next 10 st, bobble, sc, dc in next 4 st, bobble, sc, dc in next 11 st.
Row 5: Ch 3, dc in next 9 st, bobble, sc, dc in next 7 st, bobble, sc, dc in next 9 st.
Row 6: Ch 3, dc in next 7 st, bobble, sc, dc in next 10 st, bobble, sc, dc in next 8 st.
Row 7: Ch 3, dc in next 6 st, bobble, sc, dc in next 13 st, bobble, sc, dc in next 6 st.
Row 8: Ch 3, dc in next 4 st, bobble, sc, dc in next 16 st, bobble, sc, dc in next 5 st.
Row 9: Ch 3, dc in next 4 st, bobble, sc, dc in next 17 st, bobble, sc, dc in next 4 st.
Row 10: Ch 3, dc in next 4 st, bobble, sc, dc in next 7 st, bobble, sc, dc in next 7 st, bobble, sc, dc in next 5 st.
Row 11: Ch 3, dc in next 6 st, bobble, sc, dc in next 4 st, bobble, sc, dc, bobble, sc, dc in next 4 st, bobble, sc, dc in next 6 st.
Row 12: Ch 3, dc in next 7 st, bobble, sc, bobble, sc, dc in next 6 st, bobble, sc, bobble, sc, dc in next 8 st.
Row 13: Ch 3, dc in next 29 st.
✳️ Border around each heart
Working around each heart, make one hdc st in each st along the top and bottom and 20 hdc along each side (space them evenly as best as possible), with 3 hdc in each corner st. This should equal 108 stitches around each heart.
❤️ Crocheting hearts together
Before crocheting all the hearts together, I'd recommend laying all your hearts out (I found that I needed to do this on the floor, for a large enough space). This way, you can rearrange your design of open hearts and bobble hearts and colors as much as you'd like before it's all stitched together. Then, once you've decided on a design you like, take a photo of it. You'll need to refer to this photo later, when you're putting it all together. Trust me on this.
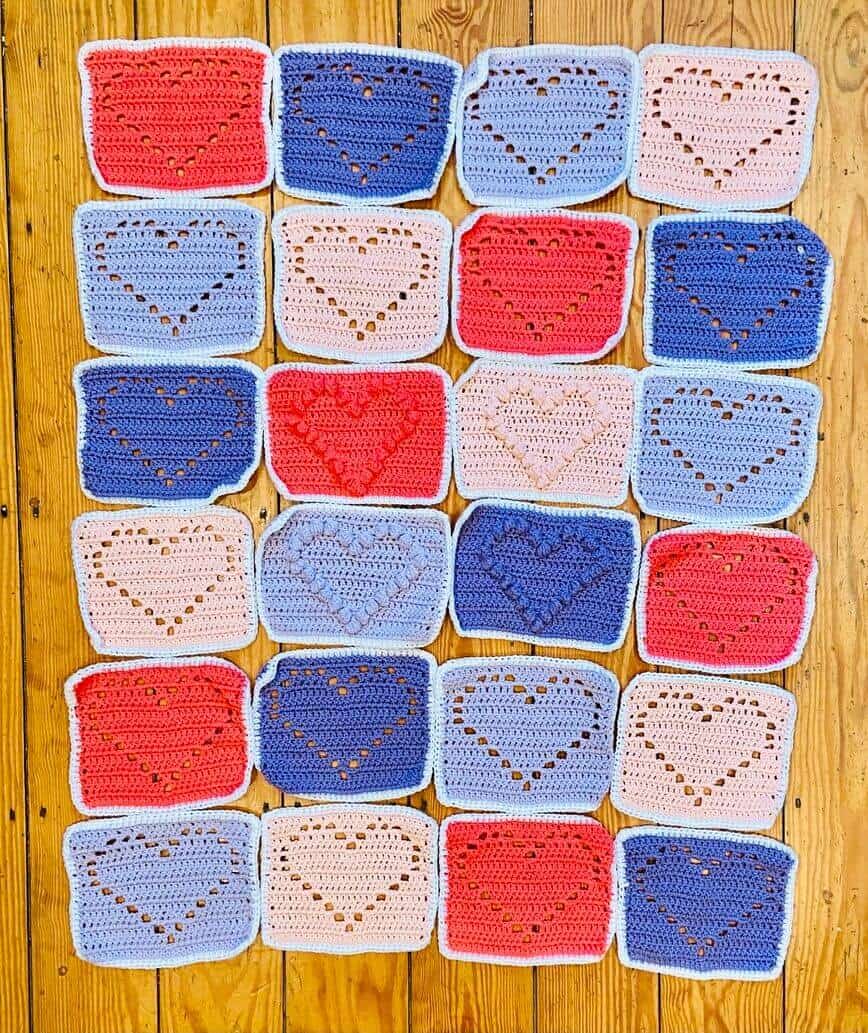
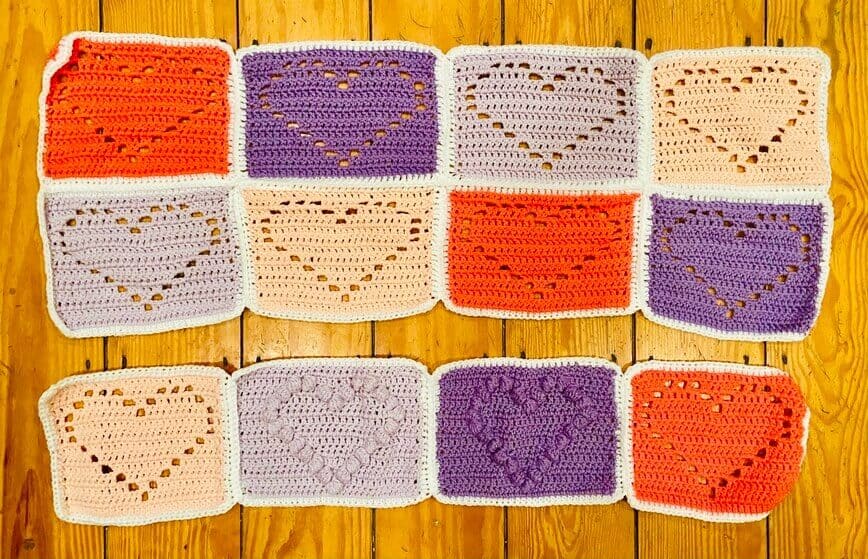
Next, crochet the "squares" into horizontal rows first, then crochet the rows together.
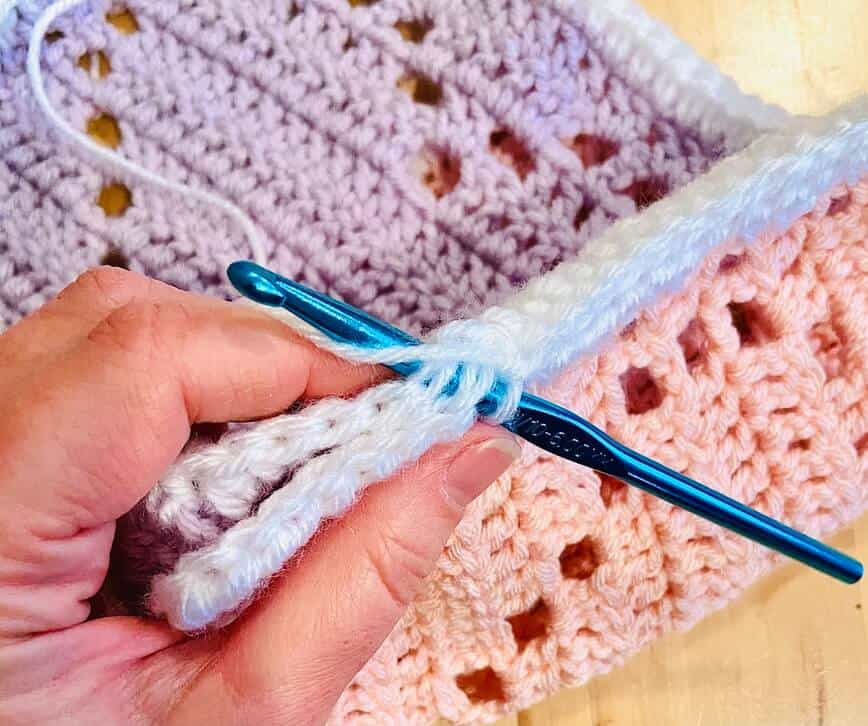
To crochet the hearts together, with the front side facing up, join them with a single crochet, making sure to go through all four loops (two loops from each "square").
💞 Blanket border
Once all the "squares" are crocheted together, it's time to make a border for the entire blanket.
As I mentioned above in the Notes section, due to the fact that this blanket is customizable to larger sizes, no total stitch numbers are given for the border. That being said, the border is made in three rows.
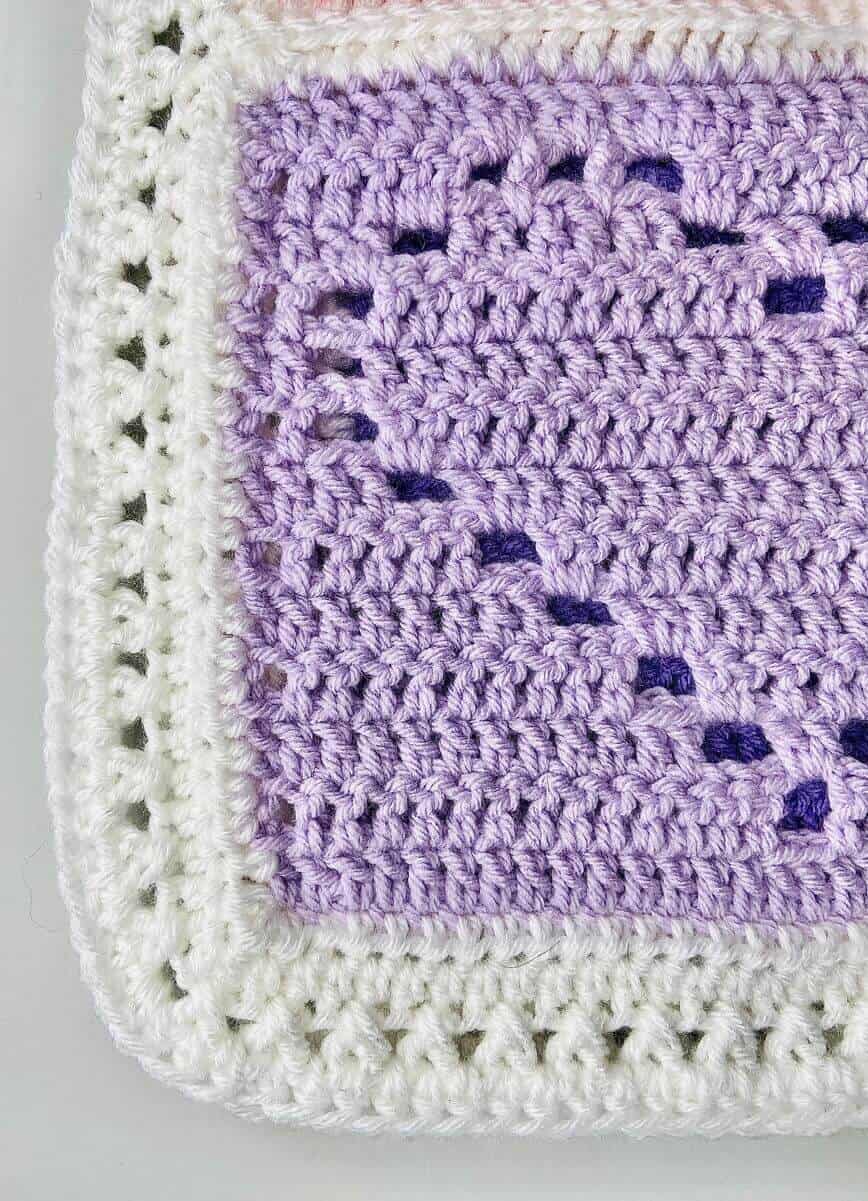
Row 1: Ch 2, then hdc in each st all the way around the entire border, making 3 hdc in each corner st.
Row 2: Crochet an X-stitch (there is a tutorial for this stitch in my video @ 8:15). To start, ch 3, then dc in the previous st, *skip one st, then dc in next st, then dc in previous stitch*, then skip one st...continue from * to * all the way around the blanket.
Row 3: Ch 2, then hdc in each space all the way around, making 3 hdc in each corner space. Each hdc will be made in the space in the center of each X and between the X's (refer to the video @ 10:55 for clarification).
You're finished! Get cozy and feel the love! ❤️

Love crochet? Check out my other fun crochet projects:
- Waffle Stitch Blanket
- Easter Bunny Amigurumi
- Easy Chunky Crochet Scarf
- Crochet Winter Hat Pattern
- Easy Infinity Scarf Crochet Pattern
- Chunky Scarf
- 2-Hour Slouch Hat
- Crochet Pocket Shawl
- Modern Crochet Pillow
Did you make this Love You With All My Heart Blanket? Let us know in the comments below!
Please be respectful and do not sell this pattern or finished product in any way, especially as your own. Instead, share the original article link or contact me for any commercial purposes (Contact Us found in the footer area of this page)!

Carol
Following your pattern as written row 11 is wrong. There are not 3 stitches with turning chain at the beginning of the row. There are only 2. Love the pattern but keep running into snags. Do you have a corrected version
Thanks
maplewoodroad
Hi Carol! 3 stitches in the turning chain is correct. Generally speaking, it's ch 1 for a sc, ch 2 for hdc, and ch 3 for dc (of course, there are exceptions sometimes). Hope this helps! 🙂
Susan Tolley
I've ran into the same problem already mentioned. Row 11 on the filet heart pattern, there is not 3 stitches when you start the row, only two. I went back thru the whole pattern stitch by stitch thinking I had missed something but my count is correct according to the pattern until I get to row 11. could you please advise? By the way, I'm not talking about the turning chain, I understand that you chain three when turning, just to clarify, there is not three "stitches" to crochet into when you start row 11.
maplewoodroad
Hi Susan! Ok, now I understand, thank you! I did make a mistake with my counts and have updated the pattern. You're right, it's not 3 stitches, it's only 1 after the turning chain. Please look at the pattern again, as I've now updated it. Thanks. 🙂
maplewoodroad
Hi Carol! I finally understand now what was going wrong for you. I did make a mistake with my counts and have updated the pattern. You're right, it's not 3 stitches, it's only 1 after the turning chain. Please look at the pattern again, as I've now updated it. Thanks. 🙂
Barbara
Hello.
Love the heart pattern. I'm not very good at joining. It looks untidy. Could you do a video of joining please
maplewoodroad
Thanks Barbara! I'll work on that! 🙂
Cassie
Hey darling
I am buying my yarn to make this beautiful blanket
I had a question though…
Would u know how many squares I can make if I follow your exact pattern with I love this yarn at 355 yards of yarn ?
maplewoodroad
Hi Cassie! Well, I used about 1700 yards for the entire blanket, so I just figured 1700 divided by 355 equals about 4 to 5 squares. 🙂
Denise
I really want to make this one, thanks so much for posting. Can you please tell me the approximate size of each square when using #4/worsted weight yarn and 6mm hook?
maplewoodroad
Each "square" measures approx 8" x 10". Thanks & enjoy! 🙂
Beth
I made two of these for gifts for two little girls. I did 7 rows of 3 panels each. They came out beautifully. I did add rotating panels with no heart to break things up. I am really pleased with how they came out. Your pattern and tutorial were very complete and easy to follow. Thank you so much!
maplewoodroad
You just made me so happy, thank you! I'm so glad you enjoyed making the blankets and hope the girls love them too! 🙂
Janice
Thank you for beautiful pattern. I love it!!
maplewoodroad
Thanks so much! 🙂
Lisa
This blanket is stunning! I love how detailed your post is with all the directions, pictures, and videos. Seriously impressed! 🙂
maplewoodroad
Thank you so much! 🙂
Denise
Thanks!