So you've planted your cucumbers, squash, and zucchini. You placed it in the perfect sunny spot in your yard, watered it when it was dry, and lovingly nurtured it the whole summer. Oh wow, look! It's starting to grow veggies!
Then, when the time comes to pick them, you find that they're rotten on the bottom. Oh no, what happened?!
The problem is that they were sitting on the ground, pressed against the earth, not receiving sun but getting plenty of soggy soil. Now, this doesn't always happen, of course, but there's absolutely a way to prevent it! Elevate them off the ground, while also providing a benefit to other garden plants. "How in the world am I supposed to do that?" you ask. It's easy and we're going to show you how!
The solution to this problem is not some Harry Potter-esque levitation, but rather a simple mesh vegetable trellis. This easy DIY trellis will both elevate your crawling plants, while also providing shade to other garden veggies that are a little more shy around the sun, like leafy lettuces. They also easily store away for winter and fold flat. All you'll need are a few materials and 1 hour!
Join 500+ cozy folks for weekly recipes, crafts & good vibes - from my home to yours.
When you sign up, I'll send you the Cozy Weekend Starter Pack-
a free PDF with 3 recipes, 3 crafts, & cozy weekend vibes.

Jump to:
😃 Benefits
- Increased air circulation on all sides of the plant = less plant disease
- Reduction in soil-borne diseases and less soil spatter on veggies
- Less insect damage since it's off the ground
- Easier harvest (won't have to bend down as far to reach the ripe veggies)
- Grow more in less space (can have two layers of plants - one on top of the trellis and one shade-tolerant underneath, like lettuce)
🌱 Great for lots of different plants
- Cucumber (which send out little tendrils to grab onto and climb the trellis)
- Zucchini
- Summer squash
- Gourds and pumpkins
- Melons
- Beans and peas (peas have tendrils too, which will hold strong onto the trellis)
- Indeterminate tomatoes
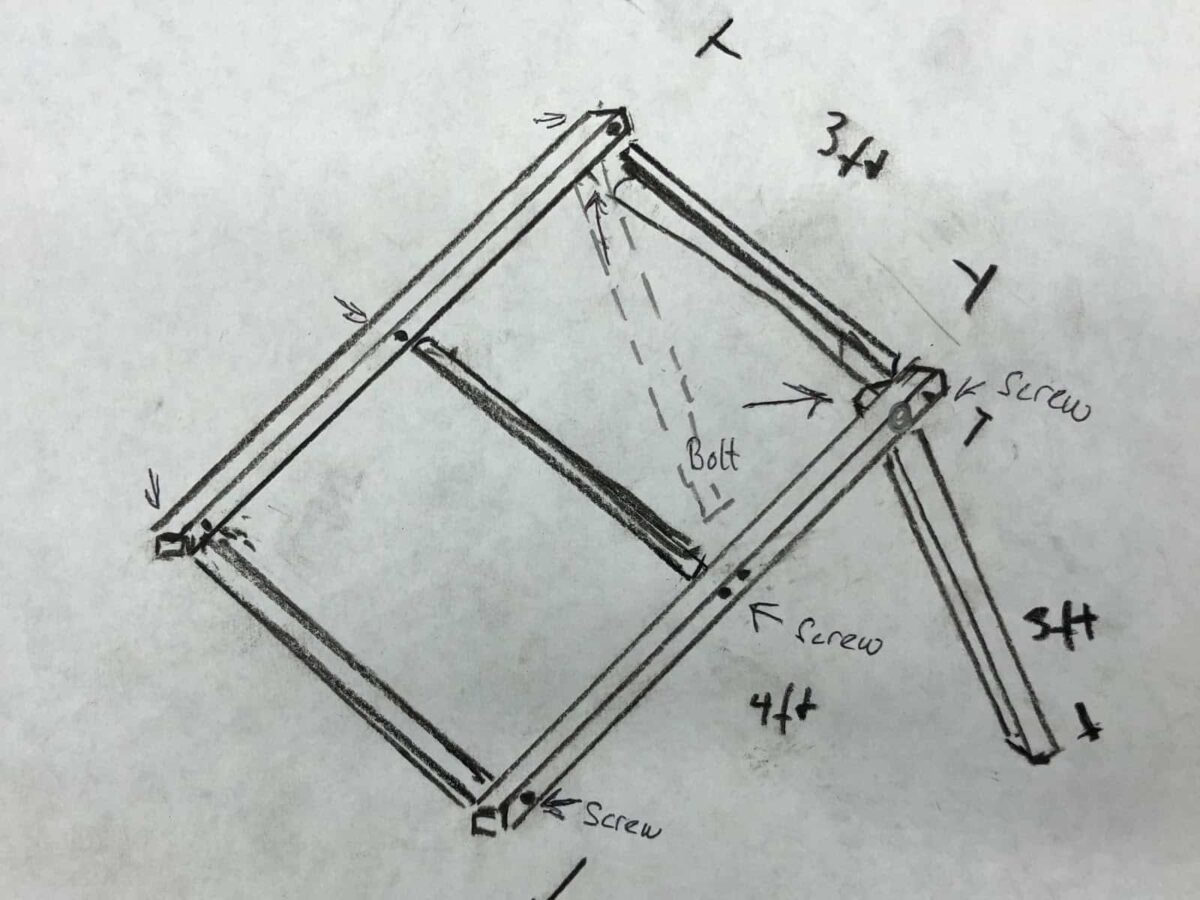
🧰 Materials (for one 4' x 3' trellis)
- 4' x 3' plastic wire mesh
- Five 2" x 2" x 3' untreated furring strip board
- Two 2" x 2" x 4' untreated furring strip board
- Two 4" bolts with nut and two washers
- Six 3" outdoor screws (I had some deck screws laying around)
- Staple gun and staples
- Drill with various bits
🔨 Build it
All the wood cost me about $6 at my local home improvement store. Cut all pieces to required length. Done cutting.
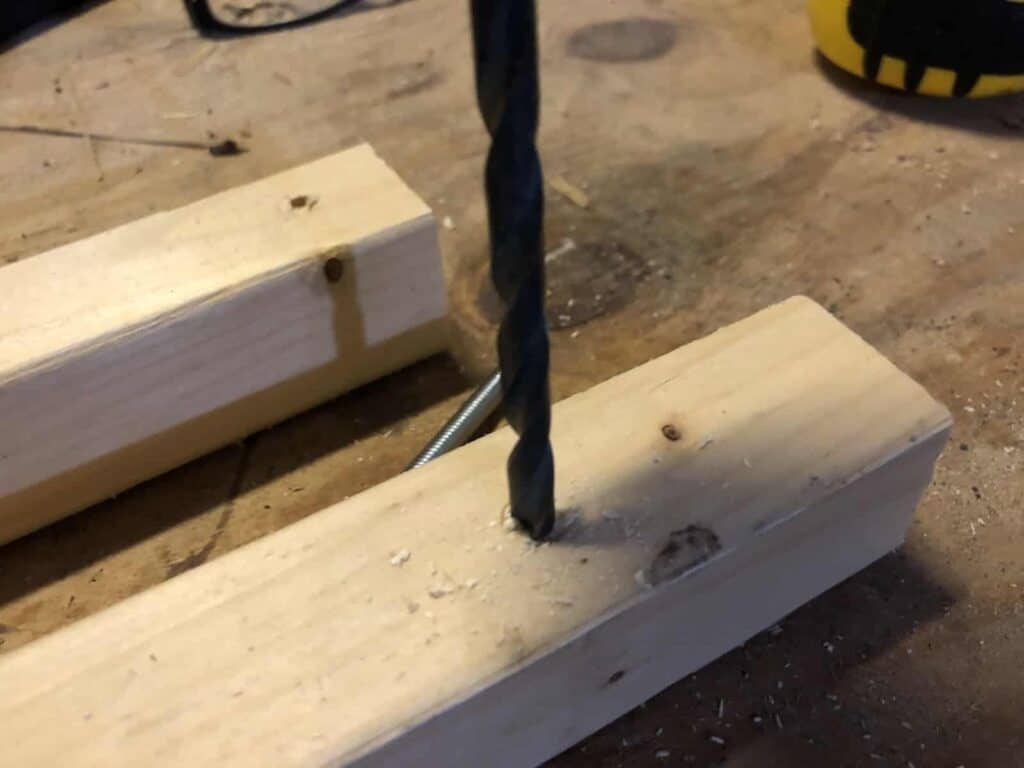
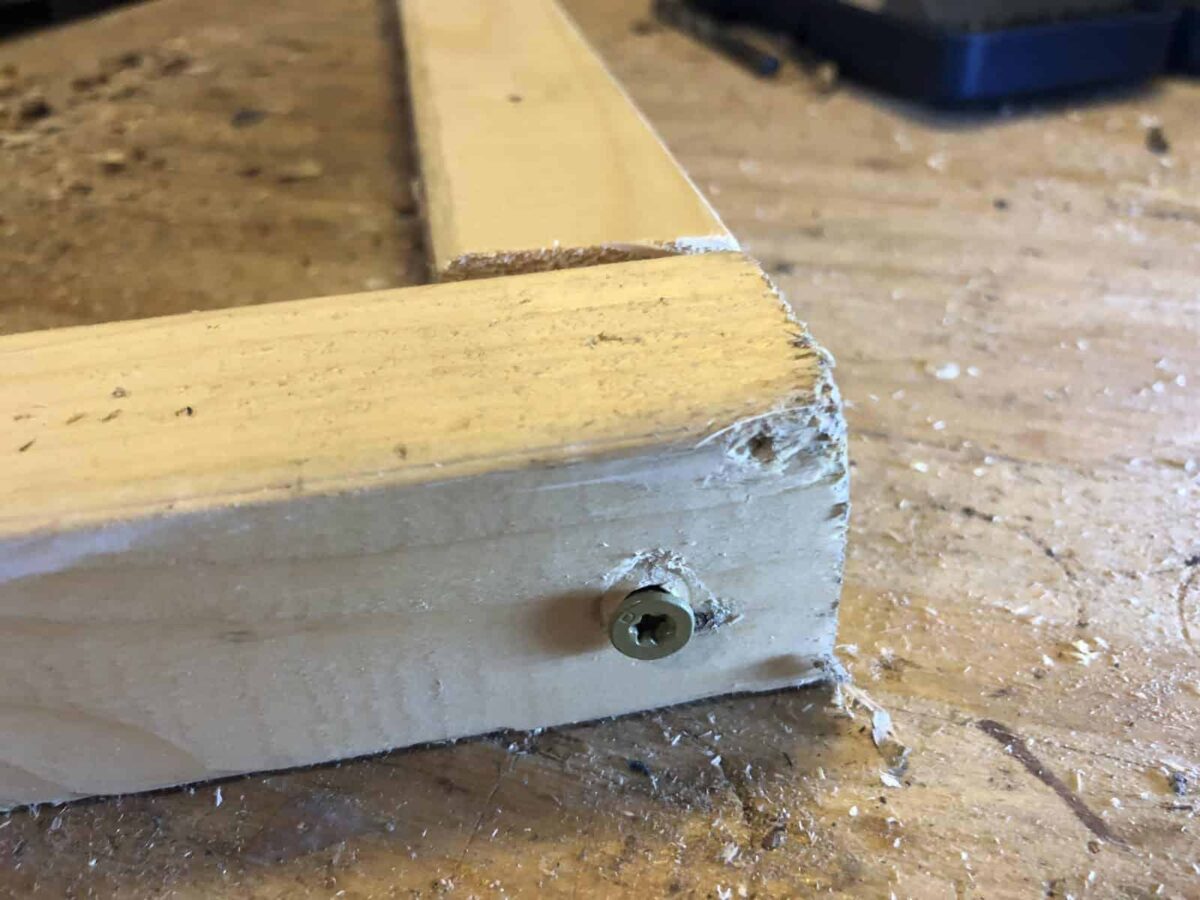
Drill pilot holes on the outside of the 4' pieces, ¾" from the top & bottom, and one in the middle. Drill holes large enough to comfortably fit the 4" bolt about 2-½" from the top. Done drilling.
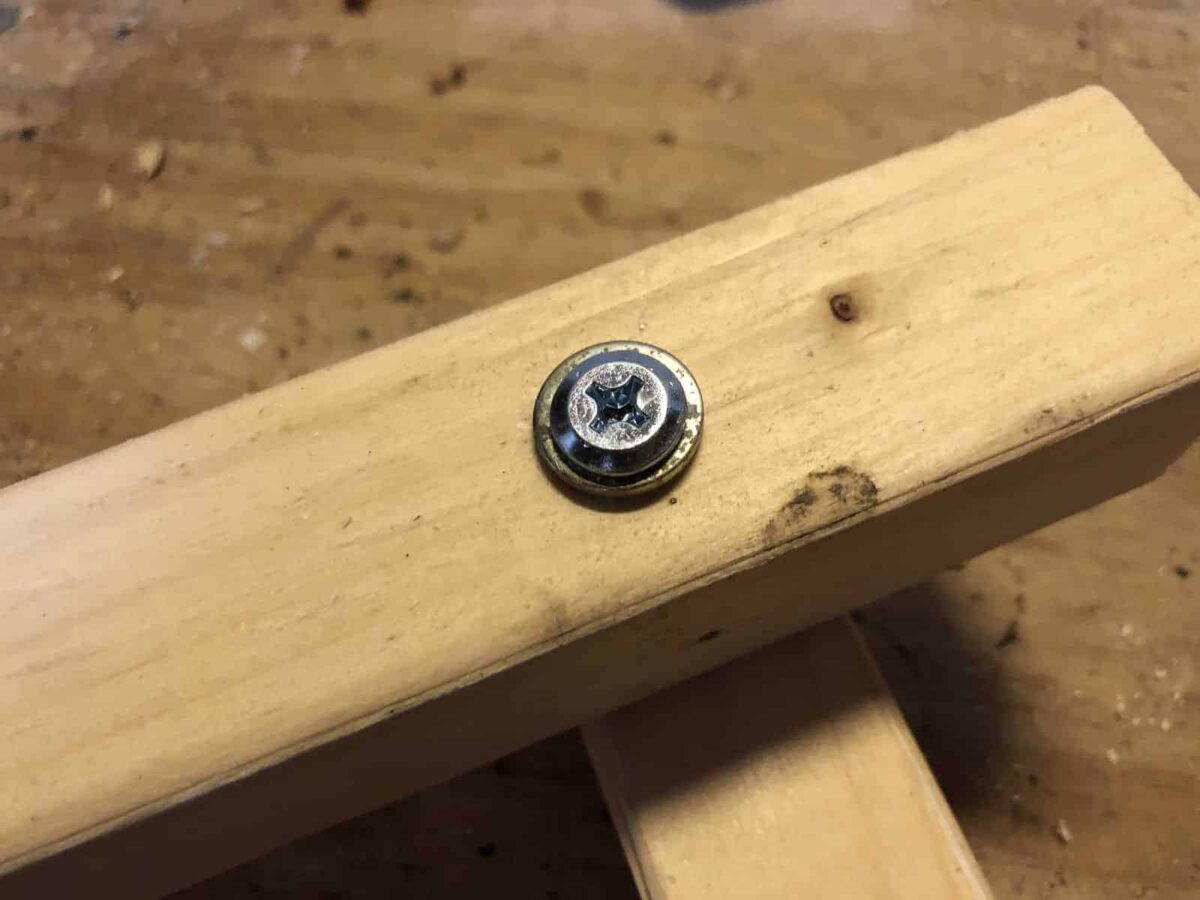
Put the frame together by connecting the outside 4' piece with the three inside 3' pieces by screwing them together with the 6 screws. Done screwing.
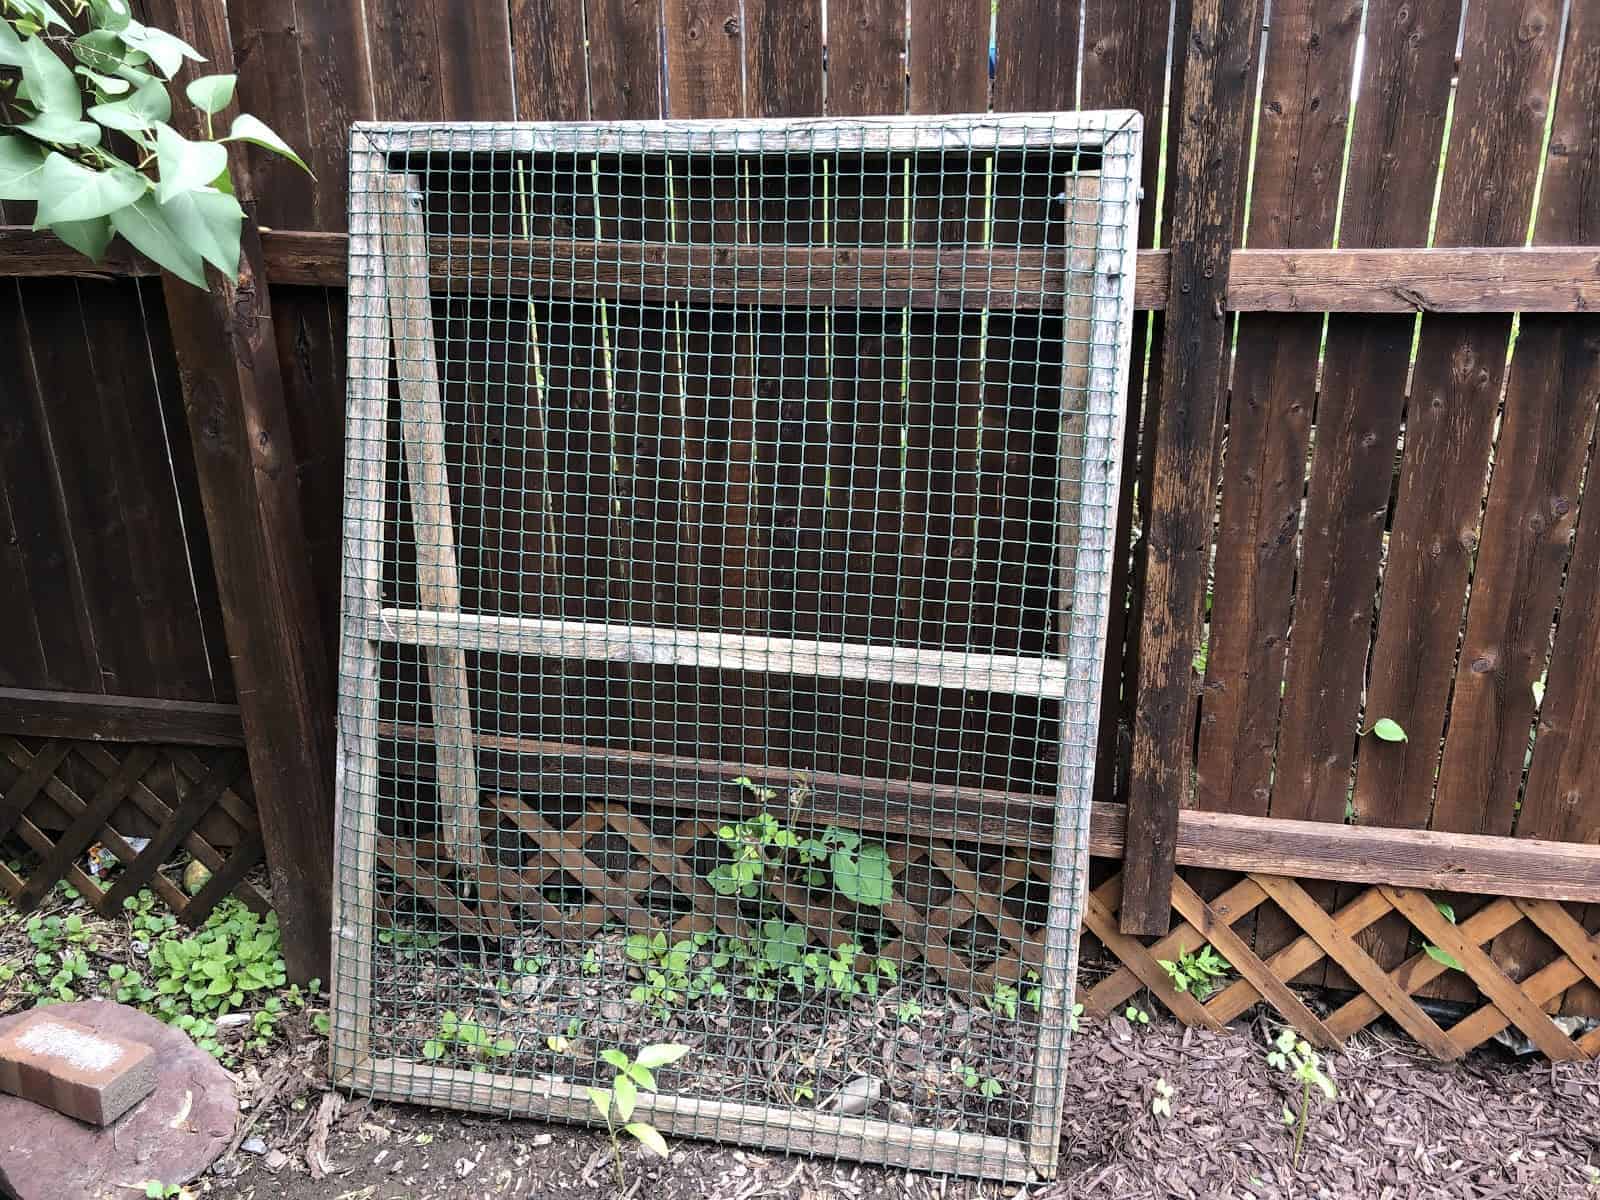
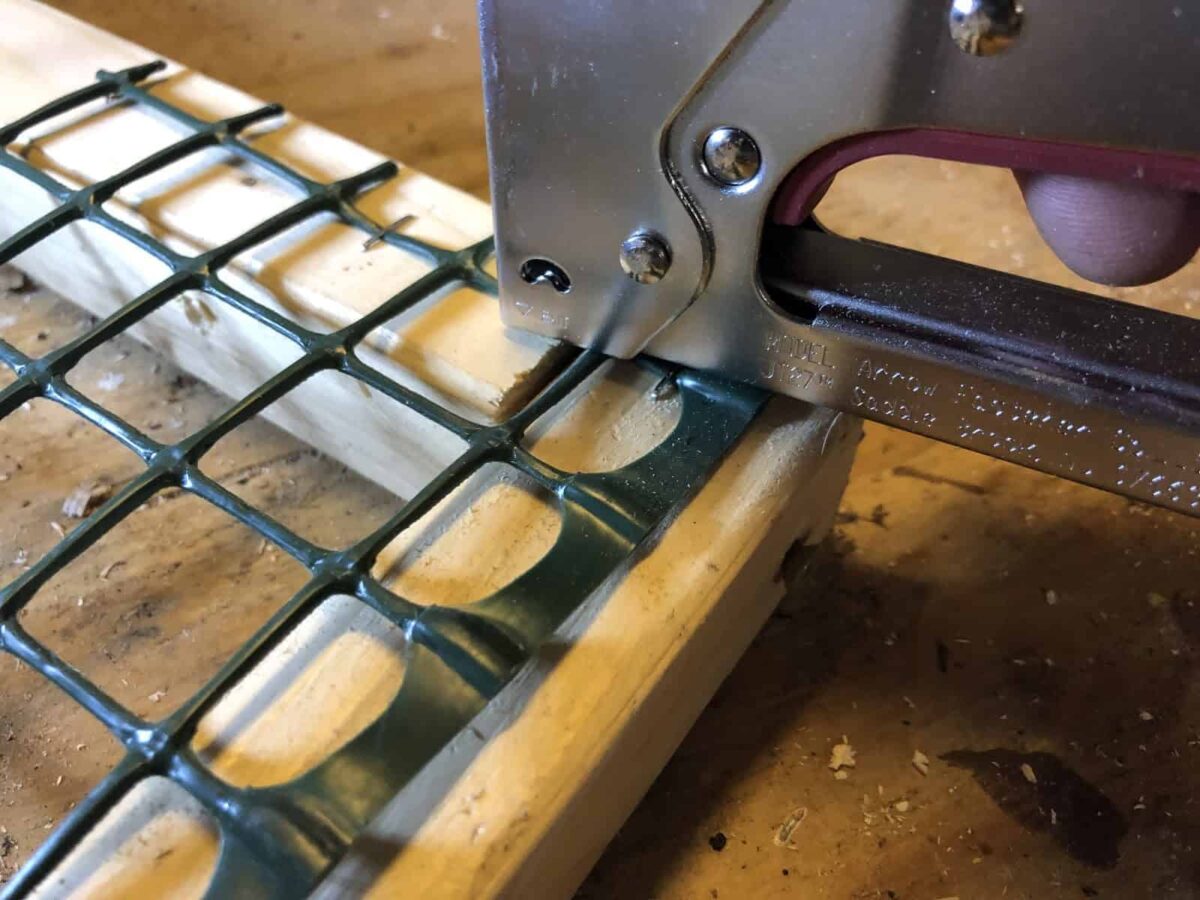
Staple on the plastic wire mesh using a staple every 2" or so. Done stapling.
Attach the legs by inserting the bolt through the legs (from outside to inside) and loosely attach the nut. Shall I say "Done nutting?" 🙂
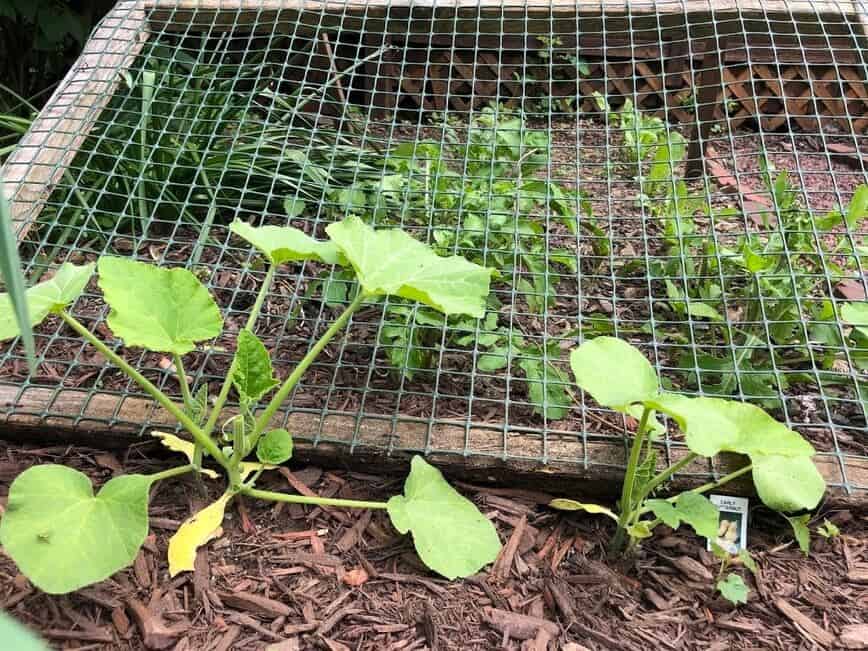
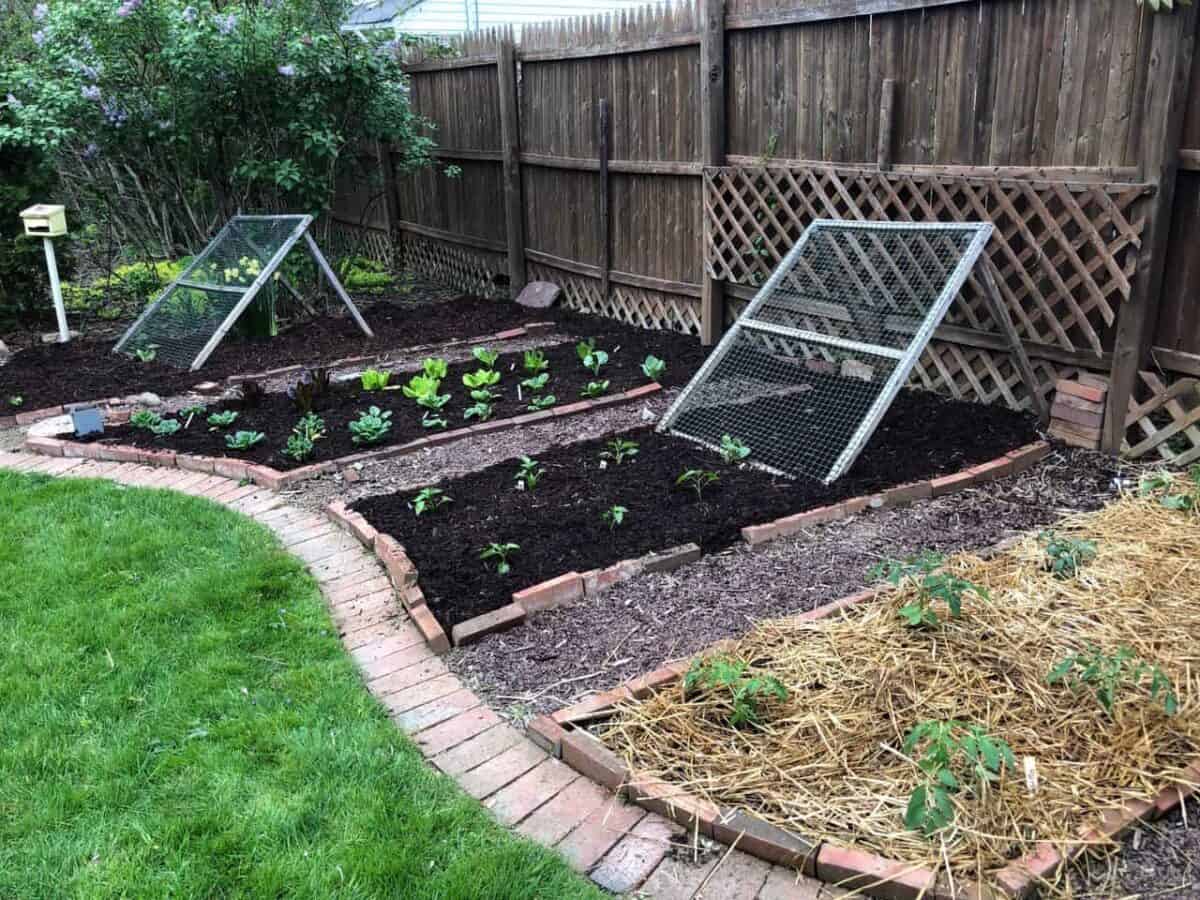
Now place your mesh trellis in your garden, just slightly behind a veggie plant that's soon to start crawling. Press the legs firmly into the ground, sit back, relax, and watch your garden grow!

Do you use a vegetable trellis in your garden? Let us know in the comments below!

Leave a Reply