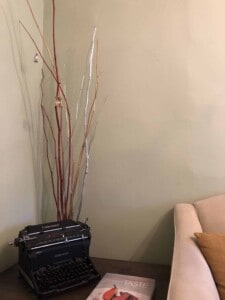
If you’re looking for a super-easy craft that has a dramatic effect for your home, you’ve come to the right place! Painted branches could not be simpler! All you’ll need are your walking shoes, a narrow vase or similar container, some pebbles, and a few cans of spray paint.
Picture it: It’s a beautiful fall or winter day and you decide to go for a walk. While strolling along, taking in all the beauty that nature has to offer, your notice that there are some tall but skinny tree branches all over the place. Your arts-and-crafts mind says, “There must be some way I can use them in a craft project.” Well, there is!

Pick up a few of those branches and take them home. The taller your ceiling, the taller the branches you can select. Try to choose branches that have different shapes and twists, but which mostly go in a straight direction. If there is any bark on the branches, simply remove it with your hands or carefully with a small knife.
Lay the branches outside in the grass, driveway, or any area you won’t mind getting spray paint on. The next step is to paint them any colors you wish! For my project, I chose silver, gold, and red. Let them dry a bit, turn them over, and paint the other side. Once they’re dry, bring them inside, and place them in a tall narrow vase or similar container. As an added step, if you wish, you can place pebbles or small gemstones in the bottom to help provide some weight to the bottom and also to help arrange them however you like. All that’s left to do is find the perfect spot in your house to display your work of art!

Did you make these Painted Branches? Let us know in the comments below!
Do your friends enjoy fun crafts too? Share this article with them and let us know what you all think by commenting below!
Tag your photos with #maplewoodroad on social media and share them on our Facebook page! Have any questions? Ask on our Maplewood Road Community Facebook page and I’ll be happy to help. 😊
Subscribe to our weekly newsletter for more great crafts!
