A few months ago, I announced to Erich that I was going to learn how to make croissants, and develop my own recipe for them too. To that, he responded “Are you crazy?!” Yes. Yes I am. I’m not one to back down from a challenge, even if it’s self-imposed.

Jump to:
🇫🇷 Learning to make croissants
Having visited France and specifically Paris several years ago, I know what a great croissant is supposed to be. It should be flaky, with as many rich buttery layers as humanly possible, this beautiful pastry defying gravity itself.
So I got on the world wide web and read articles and watched videos and scoured recipes and learned everything I could about making croissants. And then got to work.
Taking bits and pieces of recipes, then changing this, then altering that...I came up with my own recipe. Oh boy, am I really doing this?

I made the dough. I waited. I laminated. I waited some more. Finally, the time was upon me to form and bake the croissants.
This is where I learned my first lesson about croissant dough. You must work quickly.
I thought I was working fast, but apparently not fast enough. Although the countertop was lightly floured (not too much, now!), by the time I was ready to roll them into shape, they were stuck to the counter. Ugh.
But it was okay, I scraped them up, they didn’t look particularly pretty, but hey, so what, this is practice, right? The croissants went into the oven and I sat on the kitchen floor, right in front of the oven window, to watch every blessed second of their baking.

To my amazement, they came out absolutely delicious! Erich tasted one and was blown away. We then quickly found a few neighbors to do some taste testing. Although they gobbled them up and even asked for more, two people mentioned that they were a little too buttery.
WHAT?! How can a croissant be too buttery?! Whatever. Fine. I’ll play with the recipe a little more. Might want to try altering the liquid amounts too.
The next batch...I forgot the dough in the fridge for an extra day, but tried anyway ...nope, don't do that.
anyway....nope, don’t do that.
Batch #3, too much liquid.
Batch #4, not enough butter, too dense.
Batch #5, Perfection! Hallelujah!
These croissants take three days to make. No wait, don’t run away screaming! It’s only about one hour of actual work on your part, the remainder of that time is resting. And it’s not really three days, it’s actually more like 36 hours. Keep reading, I’ll explain…
The reason I say three days is because it’s done over a period of three days (see the timeline at the bottom of this article). You’ll start making the dough on, let’s say, Friday evening, then there’s about 15 minutes of rolling out to do on Saturday, then you’re baking and enjoying them on Sunday morning. Does it make more sense now?
I strongly encourage you to try this croissant recipe (and let me know what you think!). I don’t know if there’s anything more satisfying in baking than making your own homemade croissants. And if you have a sweet tooth for chocolate, I’ll also explain how to make pain au chocolat!

🧾 Ingredients
- All purpose flour
- Granulated sugar
- Unsalted butter
- Instant yeast
- Salt
- Whole milk
- Water
- Unsalted butter
- 1 large egg + a few drops of water (for egg wash)
See the recipe card below for full list of ingredients and their measurements.
🥐 How To Make Croissants
Day 1 - Making the dough
Add flour, milk, sugar, 3 tablespoon unsalted butter, yeast, and salt to the bowl of a stand mixer with a dough hook attachment. Start mixing together on low-medium speed, then slowly pour in the milk, then the water.
Mix until all ingredients are well combined and dough pulls away from sides of bowl (about 3 minutes).
Remove dough from bowl and shape into a ball. Wrap dough in cling wrap and refrigerate (at least 8 hours, but preferably overnight).
Day 2 - Laminating
Prepare the butter you’ll use for laminating the dough.
From Wikipedia:
Laminated dough is a culinary preparation consisting of many thin layers of dough separated by butter, produced by repeated folding and rolling. During baking, water in the butter vaporizes and expands, causing the dough to puff up and separate, while the lipids in the butter essentially fry the dough, resulting in a light, flaky product.
For this step, I like to use my 9 x 9” brownie pan and a pair of gloves. Line the brownie pan with cling wrap. Place the butter in the pan and press all the butter into one even layer (the reason for the gloves!). Lift it out of the pan using the cling wrap, then wrap the butter securely on all sides.
Helpful hint: If your pan is slightly rounded on the corners like mine, once the butter is wrapped, press down a little into the corners, to make the butter into more of a square shape.
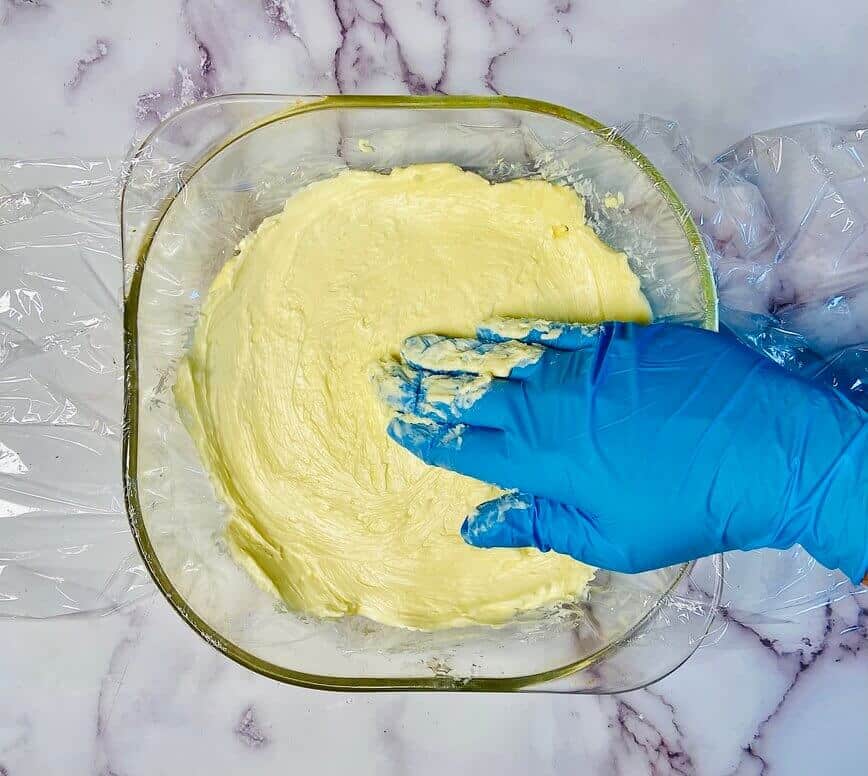
Place the butter in the fridge and let chill for 1 hour, or until it’s quite cold but still flexible.
⭐ IMPORTANT NOTE: It’s VERY important that the butter remains cold at all times throughout the remainder of this croissant-making process. If the butter warms up and seeps into the dough, your croissants won’t get those flaky layers. This is also the reason you need to work quickly throughout all steps.
Once the butter is chilled, you can start rolling out the dough (but leave the butter in the fridge for the moment).
A note about flour: While it’s important not to use too much flour on your surface when rolling out the dough, let’s be honest...you’re going to need some flour to keep it from sticking to your countertop. Just use as little flour as possible.
On a lightly floured surface, roll out dough to approximately 10” x 24”.
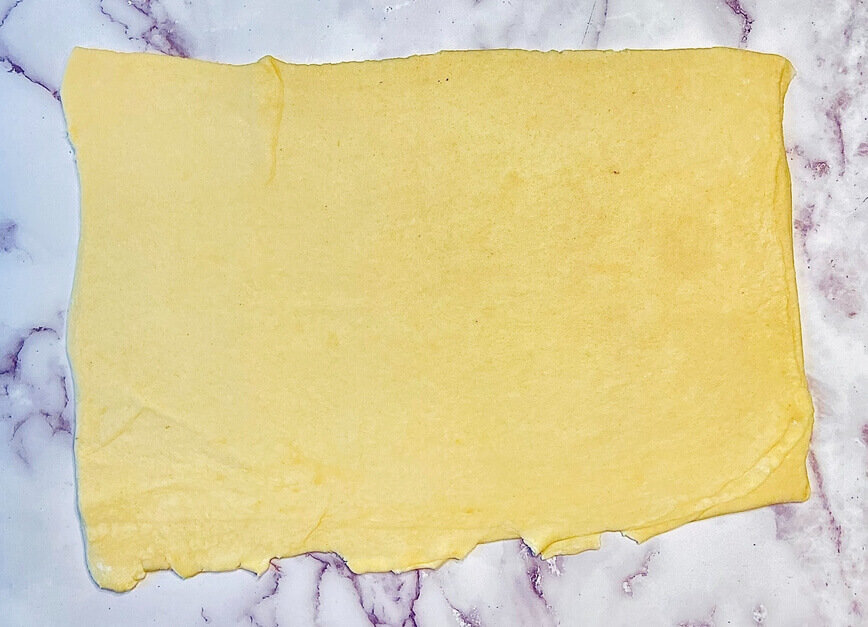
Get the butter from the fridge, remove the cling wrap, and place it in the center of your rolled out dough.
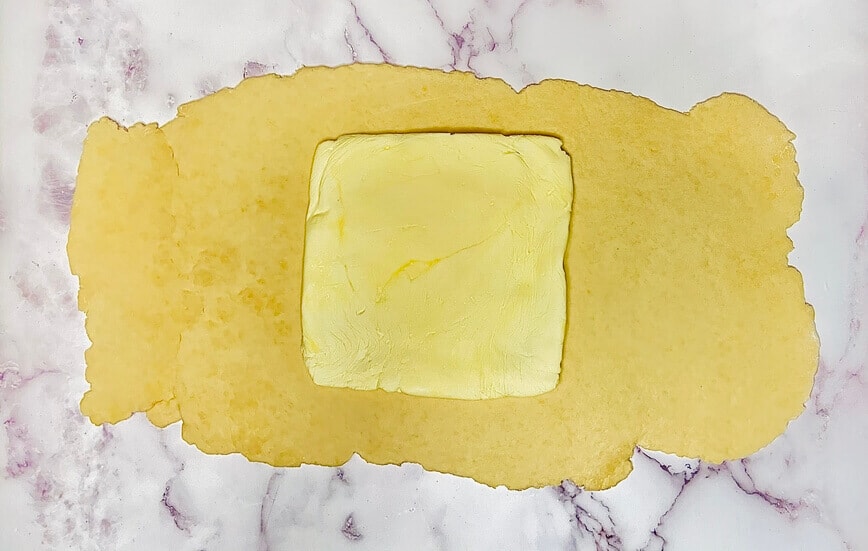
Then, fold the sides of the dough over the top of the butter (as in the photo below). Cut off any overhanging edges of dough from the top and bottom (a pizza cutter works really well for this!).
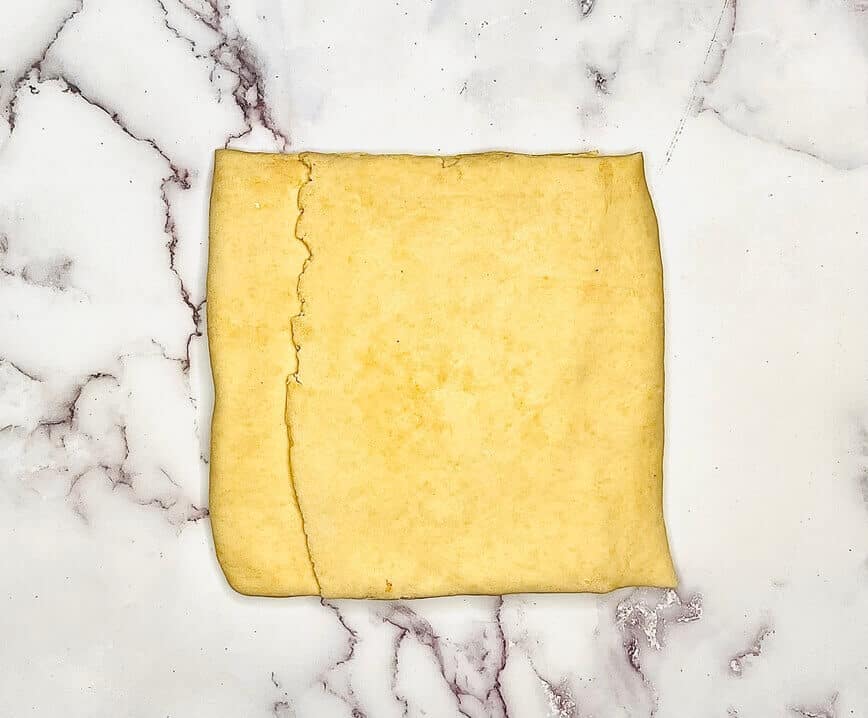
You will now need to laminate the dough and butter, by rolling it out three separate times, as in the steps below. Remember: Work quickly so the butter doesn’t get soft! Each of these steps does require some muscle, but shouldn’t take longer than a few minutes).
1) Turn the dough 90 degrees (as in the photo below) and roll out the dough to approximately 10” x 24”. Then, fold it in thirds again, wrap in cling wrap, and chill in the fridge, laid flat, for 30 minutes.
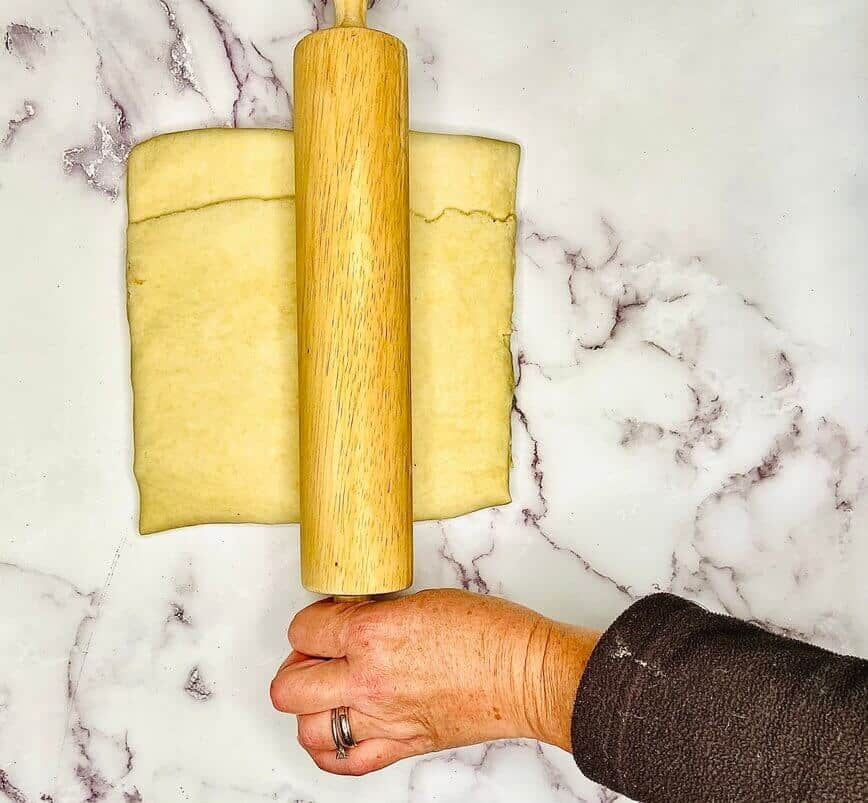
2) After 30 minutes, remove the dough from the fridge, turn it 90 degrees (as in the photo above) and again roll out the dough to approximately 10” x 24”. Then, fold in thirds again, wrap in cling wrap, and chill in the fridge, laid flat, for 30 minutes.
3) After another 30 minutes, repeat the above steps for a third time. Then, wrap it in cling wrap and chill in the fridge, laid flat, overnight (at least 8 hours, up to 24 hours).
Day 3 - Shaping and Baking
Yay, it’s baking day! But not quite yet…there’s still just a little work to do.
Roll out your dough one final time. Here’s where I learned a trick: Remember how I mentioned above that it took a little while to form all the croissants and in the meantime the dough stuck to the counter? Yeah. So here’s what you do to avoid that:
Start rolling out the dough (to an eventual size of approximately 10” x 30”). When you’ve reached about 8” x 10”, cut the dough in half using a pizza cutter, wrap half of the dough in cling wrap and put it back in the fridge. Aha! Half of the dough will stay cold while you quickly work with the other half!
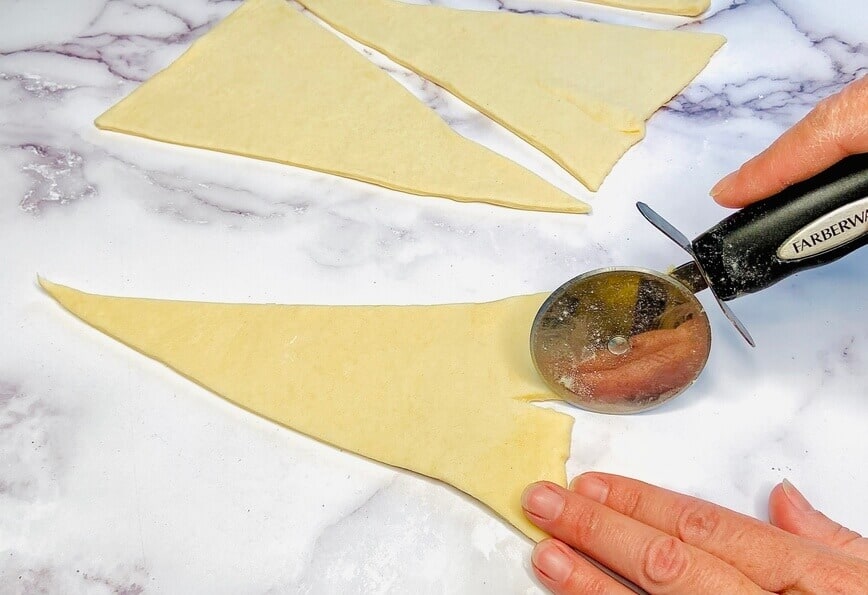
Roll out the first half of the dough to approximately 10” x 15”. Using the pizza cutter again, trim the edges so that they’re straight lines. Then cut out large, elongated triangles for your croissants.
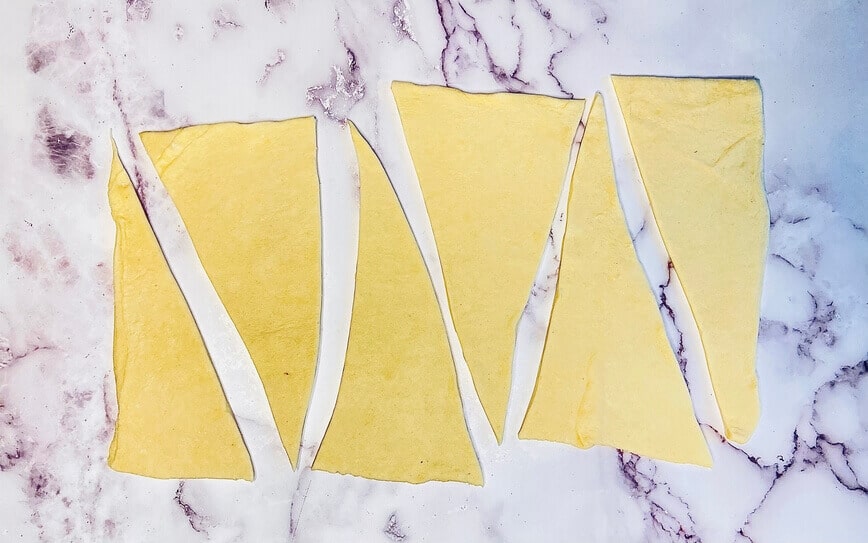
At the base of each triangle, cut a 1” long notch. This seems to be a minor detail, but is important in getting the shape just right.
To roll up the croissants, start at the base of each triangle. Spread the notch open when beginning to roll (as in the photo below). This will push the points of the triangle outward, to give the croissant those tails on the outer edges, for their classic crescent shape.
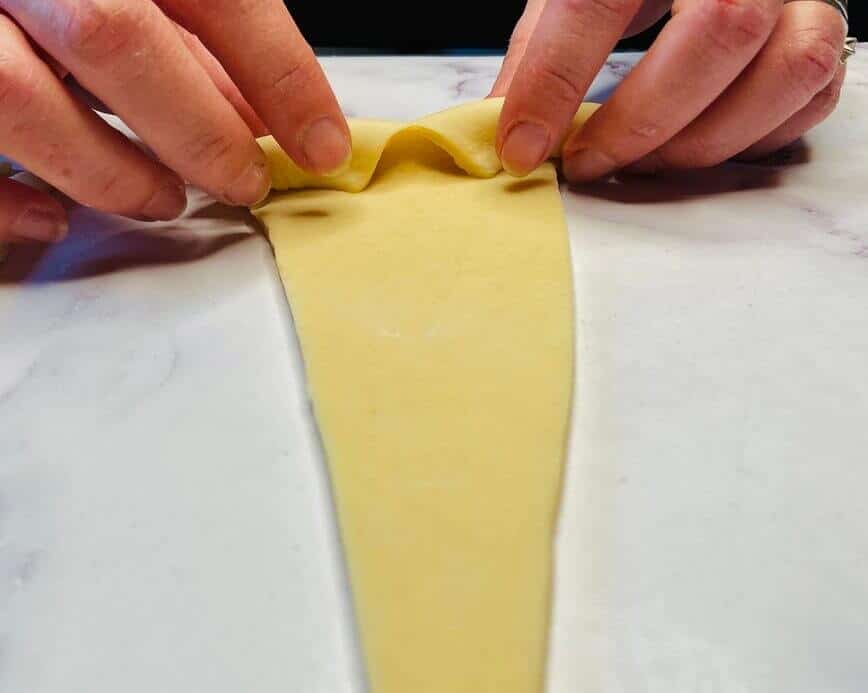
Continue rolling, tightly yet gently (you don’t want to flatten all those layers you’ve worked so hard creating!), all the way to the end.
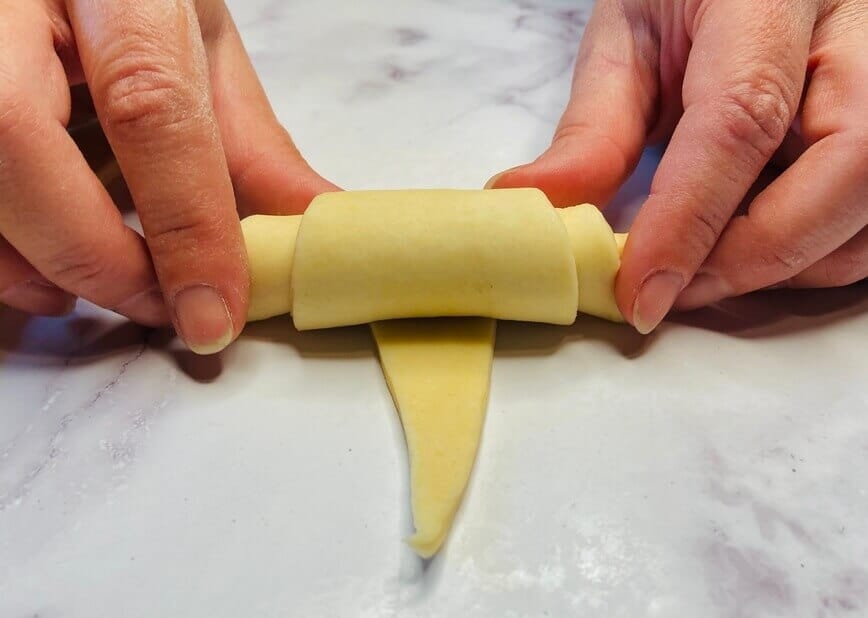
Place them on a baking sheet, with the point of the triangle underneath the rolled croissant and the edges slightly curved forward.
Repeat the steps above for the other half of your dough in the fridge.
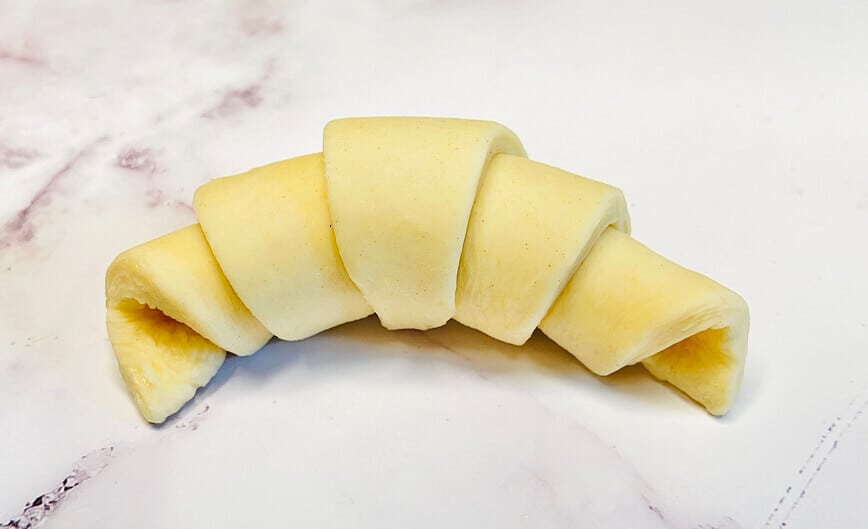
Now we’re ready to bake?! No.
Once all the croissants are in place on the baking sheets, cover them with a tea towel and let proof (aka rest) at room temperature for 2 hours. They won't rise a whole lot during this time, but every little bit counts (they'll rise even more during baking). I know, I know. But it will all be worth it very soon, I promise!
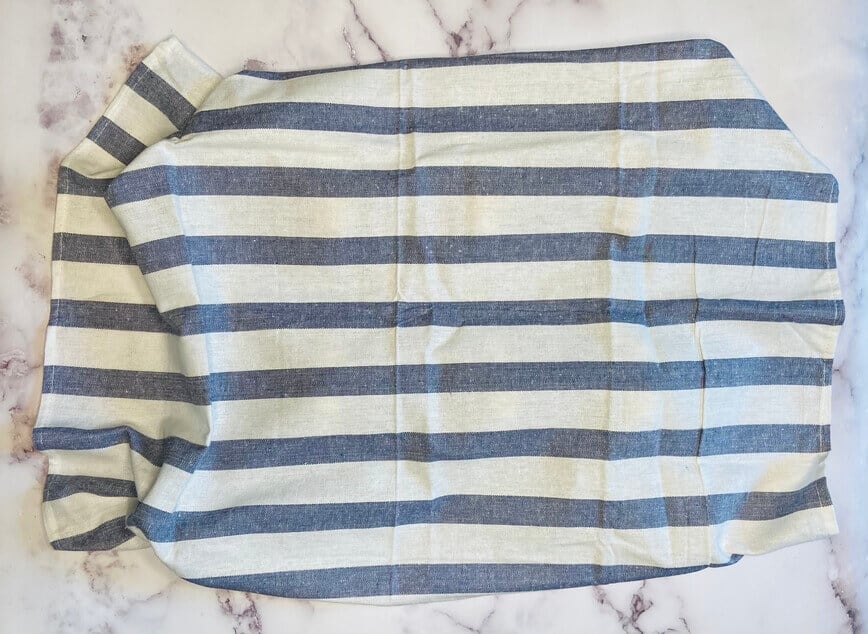
Two hours later, preheat your oven to 375°F.
In a small bowl, whisk together one egg and a few drops of water. Brush this egg wash onto your croissants, making sure to get the tops and all sides.
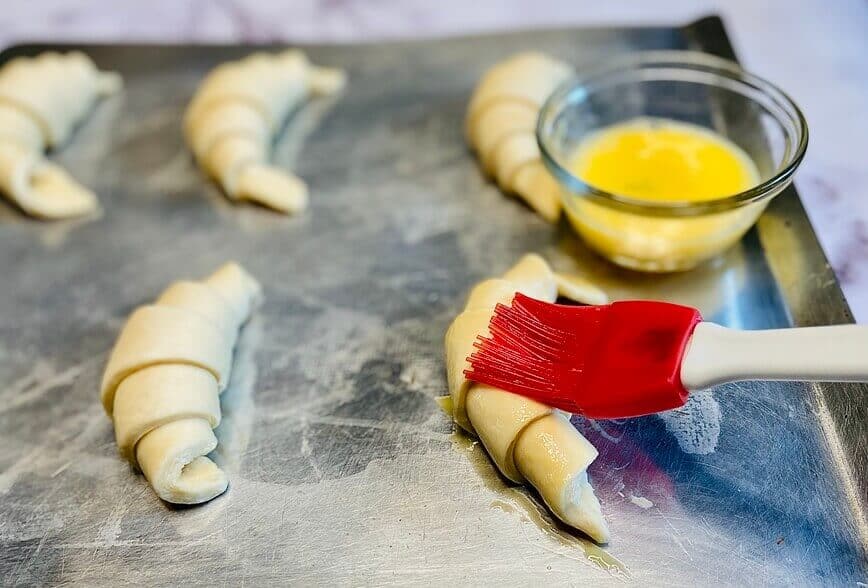
Bake for 25-30 minutes, or until croissants are nicely browned (I rotate mine halfway through, to ensure even baking). Serve immediately and enjoy!
These croissants will also stay delicious for a few days if kept in a brown paper bag on the counter.

🍫 BONUS: Pain au chocolat (Chocolate croissant recipe)
Pain au Chocolat means "chocolate bread" in French. And it couldn’t be easier to make!
Now, there is some argument over whether pain au chocolat and chocolate croissant are the same thing. The argument may stem from the fact that the original pain au chocolat was created by a baker who made them of brioche, not croissant dough.
In the meantime, however, they are often made with croissant dough and the names pain au chocolat and chocolate croissant are used interchangeably in many countries around the world, including the USA, Australia, and New Zealand, and parts of Canada.
When rolling out your croissants, as above, and after cutting the notch in the dough, place a line of mini chocolate chips near the base of the triangle and roll up and bake as usual. That’s it!
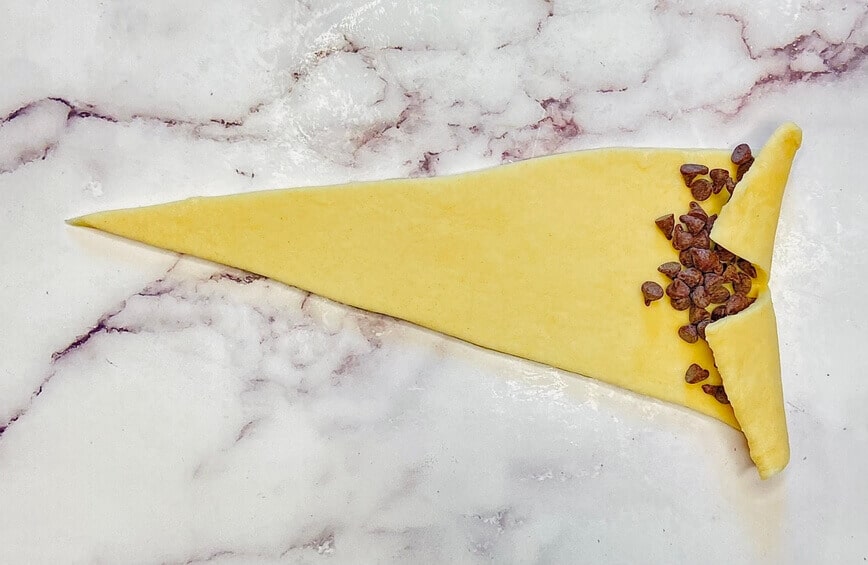
I’ve tried this with regular baking chocolate chips and white chocolate chips and both tasted amazing! I’m going to keep experimenting with different fillings for these croissants, so check back soon for updates!
Bon appétit!

🕓 Croissant timeline
Of course, you don't have to follow these times exactly. This is just an example of the timeline you may use to make your croissants.
Day 1:
7:00 pm - Make the dough
7:10 pm - Wrap in cling wrap and let it chill in the fridge overnight (at least 8 hours, up to 24 hours)
Day 2:
11:00 am - Make butter layer, wrap in cling wrap, and chill in fridge 60 minutes
12:00 pm - Lamination step 1, wrap in cling wrap, and chill in fridge for 30 minutes
12: 35 pm - Lamination step 2, wrap in cling wrap, and chill in fridge for 30 minutes
1:10 pm - Lamination step 3, wrap in cling wrap, and chill in the fridge overnight (at least 8 hours, up to 24 hours)
Day 3:
7:00 am - Roll out dough. Cut in half to it doesn’t stick to the counter (put other half back in fridge)
7:15 am - Cut and form croissants
7:25 am - Let proof one final time at room temperature, under towels, for 2 hours
9:25 am - Egg wash and bake for 25-30 minutes at 375°F.

Love delicious baked goods? Check out a few more of our recipes now!
- Peach Mango Turnovers
- Homemade Cinnamon Rolls
- Best Banana Nut Bread
- Lemon Raspberry Cheesecake Bars
- Zesty Blueberry Muffins with Streusel Topping
- Sour Cream Coffee Cake
- No-Knead Herb-Infused Ciabatta Bread
- Fresh Fruit Tart
- Chocolate Zucchini Bread
- Barchiglia - Pear Almond Tart
Did you make this Homemade Croissant Recipe? Let us know in the comments below!
📝 Recipe

How to Make Croissants (and Pain au Chocolat!)
Ingredients
- 4 cups all purpose flour, sifted
- ⅓ cup granulated sugar
- 3 tablespoons unsalted butter, softened
- 2-¼ teaspoons instant yeast
- 1-½ teaspoons salt
- 1 cup whole milk
- ¼ cup water, at room temperature
- 1-¼ cups (2-½ sticks) unsalted butter, softened (for laminating)
- 1 large egg + a few drops of water (for egg wash)
Instructions
Day 1:
- Start mixing together on low-medium speed, then slowly pour in the milk, then the water.
- Mix until all ingredients are well combined and dough pulls away from sides of bowl (about 3 minutes).
- Remove dough from bowl and shape into a ball. Wrap dough in cling wrap and refrigerate (at least 8 hours, but preferably overnight).
Day 2:
- Prepare the butter you’ll use for laminating the dough.
- For this step, I like to use my 9 x 9” brownie pan and a pair of gloves. Line the brownie pan with cling wrap.
- Place the butter in the pan and press all the butter into one even layer (the reason for the gloves!).
- Lift it out of the pan using the cling wrap, then wrap the butter securely on all sides.
- Place the butter in the fridge and let chill for 1 hour, or until it’s quite cold but still flexible.
- Once the butter is chilled, you can start rolling out the dough (but leave the butter in the fridge for the moment).
- On a lightly floured surface, roll out dough to approximately 10” x 24”.
- Get the butter from the fridge, remove the cling wrap, and place it in the center of your rolled out dough.
- Then, fold the sides of the dough over the top of the butter. Cut off any overhanging edges of dough from the top and bottom.
- Turn the dough 90 degrees and roll out the dough to approximately 10” x 24”. Then, fold it in thirds again, wrap in cling wrap, and chill in the fridge, laid flat, for 30 minutes.
- After 30 minutes, remove the dough from the fridge, turn it 90 degrees (as in the photo above) and again roll out the dough to approximately 10” x 24”. Then, fold in thirds again, wrap in cling wrap, and chill in the fridge, laid flat, for 30 minutes.
- After another 30 minutes, repeat the above steps for a third time. Then, wrap it in cling wrap and chill in the fridge, laid flat, overnight (at least 8 hours, up to 24 hours).
Day 3:
- Roll out your dough one final time.
- Start rolling out the dough (to an eventual size of approximately 10” x 30”). When you’ve reached about 8” x 10”, cut the dough in half using a pizza cutter, wrap half of the dough in cling wrap and put it back in the fridge.
- Roll out the first half of the dough to approximately 10” x 15”. Using the pizza cutter again, trim the edges so that they’re straight lines.
- Then cut out large, elongated triangles for your croissants.
- At the base of each triangle, cut a 1” long notch.
- To roll up the croissants, start at the base of each triangle. Spread the notch open when beginning to roll. This will push the points of the triangle outward, to give the croissant those tails on the outer edges, for their classic crescent shape.
- Continue rolling, tightly yet gently (you don’t want to flatten all those layers you’ve worked so hard creating!), all the way to the end.
- Place them on a baking sheet, with the point of the triangle underneath the rolled croissant and the edges slightly curved forward.
- Repeat the steps above for the other half of your dough in the fridge.
- Once all the croissants are in place on the baking sheets, cover them with a tea towel and let proof (aka rest) at room temperature for 2 hours.
- Two hours later, preheat your oven to 375°F.
- In a small bowl, whisk together one egg and a few drops of water. Brush this egg wash onto your croissants, making sure to get the tops and all sides.
- Bake for 25-30 minutes, or until croissants are nicely browned (I rotate mine halfway through, to ensure even baking). Serve immediately and enjoy!
Notes
- Cold butter: It’s VERY important that the butter remains cold at all times throughout the remainder of this croissant-making process. If the butter warms up and seeps into the dough, your croissants won’t get those flaky layers. This is also the reason you need to work quickly throughout all steps.
- About the flour: While it’s important not to use too much flour on your surface when rolling out the dough, let’s be honest...you’re going to need some flour to keep it from sticking to your countertop. Just use as little flour as possible.
- Storage: These croissants will stay delicious for a few days if kept in a brown paper bag on the counter.
- Pain au chocolat: When rolling out your croissants, as above, and after cutting the notch in the dough, place a line of mini chocolate chips near the base of the triangle and roll up and bake as usual. That’s it!
- Croissant timeline: Of course, you don't have to follow these times exactly. This is just an example of the timeline you may use to make your croissants. Day 1: 7:00 pm - Make the dough 7:10 pm - Wrap in cling wrap and let it chill in the fridge overnight (at least 8 hours, up to 24 hours) Day 2: 11:00 am - Make butter layer, wrap in cling wrap, and chill in fridge 60 minutes 12:00 pm - Lamination step 1, wrap in cling wrap, and chill in fridge for 30 minutes 12: 35 pm - Lamination step 2, wrap in cling wrap, and chill in fridge for 30 minutes 1:10 pm - Lamination step 3, wrap in cling wrap, and chill in the fridge overnight (at least 8 hours, up to 24 hours) Day 3: 7:00 am - Roll out dough. Cut in half to it doesn’t stick to the counter (put other half back in fridge) 7:15 am - Cut and form croissants 7:25 am - Let proof one final time at room temperature, under towels, for 2 hours 9:25 am - Egg wash and bake for 25-30 minutes at 375°F.

Content and photographs are copyright protected. Sharing of this recipe is both encouraged and appreciated. Copying and/or pasting full recipes to any social media is strictly prohibited.


Peter
I really love the recipe! It's awesome and delicious.
maplewoodroad
Thank you! 🙂
Anna
I love croissants. Can't wait to try this recipe.
maplewoodroad
Thanks so much! Enjoy! 🙂
hari
wow! this looks fabulous.
it is completely a new recipe for me.
In fact, I am hearing it for the first time.
I feel like it is the kind of recipe where you have to try some time before you get the hang of it.
thanks for sharing this awesome one.