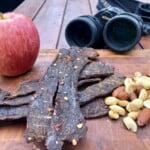
Don’t Leave Home Without It: Homemade Beef Jerky to Take on Your Next Hike
I’m not going to hike up to my favorite hawk watching spot without bringing along some of my homemade beef jerky. And neither should you.
Servings: 12 one-ounce servings
Calories: 126kcal
Equipment
- Food dehydrator
Ingredients
- 2 pounds top round London broil
- ⅔ cup soy sauce
- ⅔ cup Worcestershire sauce
- 1 teaspoon liquid smoke
- 2 teaspoons freshly ground pepper
- 1 teaspoon onion powder
- 1 teaspoon garlic powder
- 1 teaspoon cayenne pepper
- 1 tablespoon paprika
- 1 tablespoon brown sugar
- 2 tablespoons pineapple juice
- *For spicy version, simply replace 1 teaspoon liquid smoke with 1 tablespoon hot pepper flakes.
Instructions
- Mix all ingredients for the marinade.
- Cut the slightly frozen meat against the grain in even ¼-inch slices.
- Mix the meat and marinade (after mixing it in a bowl, transfer it to a gallon ziploc bag and squeeze out most of the air before closing it. This will help marinate the meat evenly) and refrigerate for at least four hours and up to overnight.
- Shake or dab off any excess marinade and lay the meat strips evenly on the trays of the food dehydrator.
- Set the temperature to 160℉.
- Rotate the trays approximately every hour (put the top tray on the bottom) to ensure even drying. But I’m not even sure if that’s necessary because of the built-in fan.
- Start checking after about 3-½ hours for doneness. When bending the meat strip, it should crack but not break.
Notes
- The meat: So, which cut of meat should you use? I prefer top round London broil. As a general rule, any lean meat will do. If I’m not buying from my local butcher, I’ll get it at the supermarket when it’s on sale. The neat thing about making beef jerky is that you can stock up on your favorite meat whenever it’s on sale. Then, when you get home, put it in the freezer and it will be ready when you are. Why in the freezer? Because you have to slice it. And the easiest and most consistent way to do this is by semi-defrosting it. When the meat is still mostly frozen inside, grab a very sharp chef’s knife and slice the beef against the grain, ¼-inch thick.
- Storage: Really? Why not eat it instead? Just kidding. I prefer to make big batches and store some of it. In a sealed container, jerky will keep at room temperature for up to two weeks. Put it in the fridge and it will last at least 4 weeks. If you go overboard and make a lot of jerky, store it in the freezer. In my personal experience, I haven’t noticed any flavor difference regardless of storage option.
- The math: First, we have to consider the “shrinkage factor.” Drying this cut of meat reduces the weight by an average of 60%. Four pounds (64 ounces) of meat will yield less than 2 pounds (25.6 ounces) of jerky. Store-bought beef jerky can cost you anywhere from $1/ounce (hello nitrates, preservatives, and MSG) to over $4/ounce (all-natural and some are even gluten free). Supermarkets in our area sell top round London broil, on average, for about $5/pound, but occasionally will have it on sale for $3/pound or even buy-one-get-one free. This translates to a cool $0.39 - $0.78/ounce of delicious, healthy, homemade beef jerky.
- Suggestion: If you enjoy this, you're gonna love our mushroom jerky!

Nutrition
Calories: 126kcal | Carbohydrates: 6g | Protein: 19g | Fat: 3g | Sodium: 920mg | Potassium: 455mg | Fiber: 1g | Sugar: 3g | Vitamin A: 110IU | Vitamin C: 3mg | Calcium: 41mg
